 Claude
  Perplexity
How to Check Domain Spam Score and Safeguard Your Reputation
Learn how to check domain spam scores with our guide. We cover blacklist tools, DNS records, and actionable steps to protect your email deliverability.
TL;DR: Learn how to check domain spam scores with our guide. We cover blacklist tools, DNS records, and actionable steps to protect your email deliverability.
If you’ve ever felt like your emails are shouting into a void, you’re not alone. One minute, your open rates are solid, and the next, important messages are getting zero engagement. The likely culprit? Your domain’s reputation has been flagged, and your emails are being rerouted straight to the spam folder.
To figure out if your domain has a spam problem, you need to play detective. It involves a bit of a health check-up, looking at everything from public blacklists to the technical nitty-gritty of your email setup. Think of mailbox providers like Gmail and Outlook as bouncers at an exclusive club; if your domain doesn’t look trustworthy, your messages aren’t getting in.
Let’s break down how to diagnose the problem and get your emails back into the inbox where they belong.
Why Your Emails Are Going to Spam (and How to Fix It)
So, why does a perfectly good email from a legitimate business end up in the junk folder? It’s usually not about the words you use in your subject line. It’s about trust.
Mailbox providers use a whole host of signals to decide if you’re a sender they can rely on. If your domain raises any red flags, they’ll quietly divert your emails away from the primary inbox. Understanding what they’re looking for is the first real step to fixing your deliverability.
The Hidden Issues Tanking Your Deliverability
Most of the time, the things that hurt your reputation are happening behind the scenes. If you’re struggling to reach the inbox, it’s time to investigate these four key areas:
- Blacklist Status: Your domain or sending IP address might have landed on a public blacklist. These are lists used by email providers to block messages from known or suspected spammers.
- Authentication Records: Proper email authentication is non-negotiable. If your SPF, DKIM, and DMARC records are missing or set up incorrectly, providers can’t verify that your emails are actually from you.
- Sending History: Have you recently sent a massive campaign out of the blue? Are you seeing a lot of bounced emails? Spikes in volume, high bounce rates, and consistently low engagement all signal to providers that something is off.
- Recipient Complaints: This one is a killer. Every time a recipient marks your email as spam, it’s a direct blow to your reputation score.
The scale of the spam problem is staggering. Spam makes up roughly 45.6% of all email traffic worldwide. With billions of unwanted emails flying around every day, it’s no wonder providers are so strict. Sticking to strong email security best practices is essential to prove you’re one of the good guys and avoid being filtered out with the noise.
Running Your First Domain Health Check
When you first suspect a problem with your email deliverability, the quickest way to get an answer is to use one of the many free, powerful diagnostic tools online. Think of this as your first line of defense—a quick snapshot of how the world sees your domain before you start digging into the technical weeds. These tools check all the major blacklists to see if you’ve been flagged for suspicious activity.
I’ve seen it happen countless times: a sales team’s open rates suddenly fall off a cliff. A simple check reveals their domain landed on a major list like Spamhaus because of a tiny misconfiguration on a new email platform. It’s a classic, avoidable mistake, and these tools help you spot it fast.
This flowchart gives you a bird’s-eye view of how mailbox providers like Gmail and Outlook size up your domain’s reputation to decide if your emails get delivered or junked.
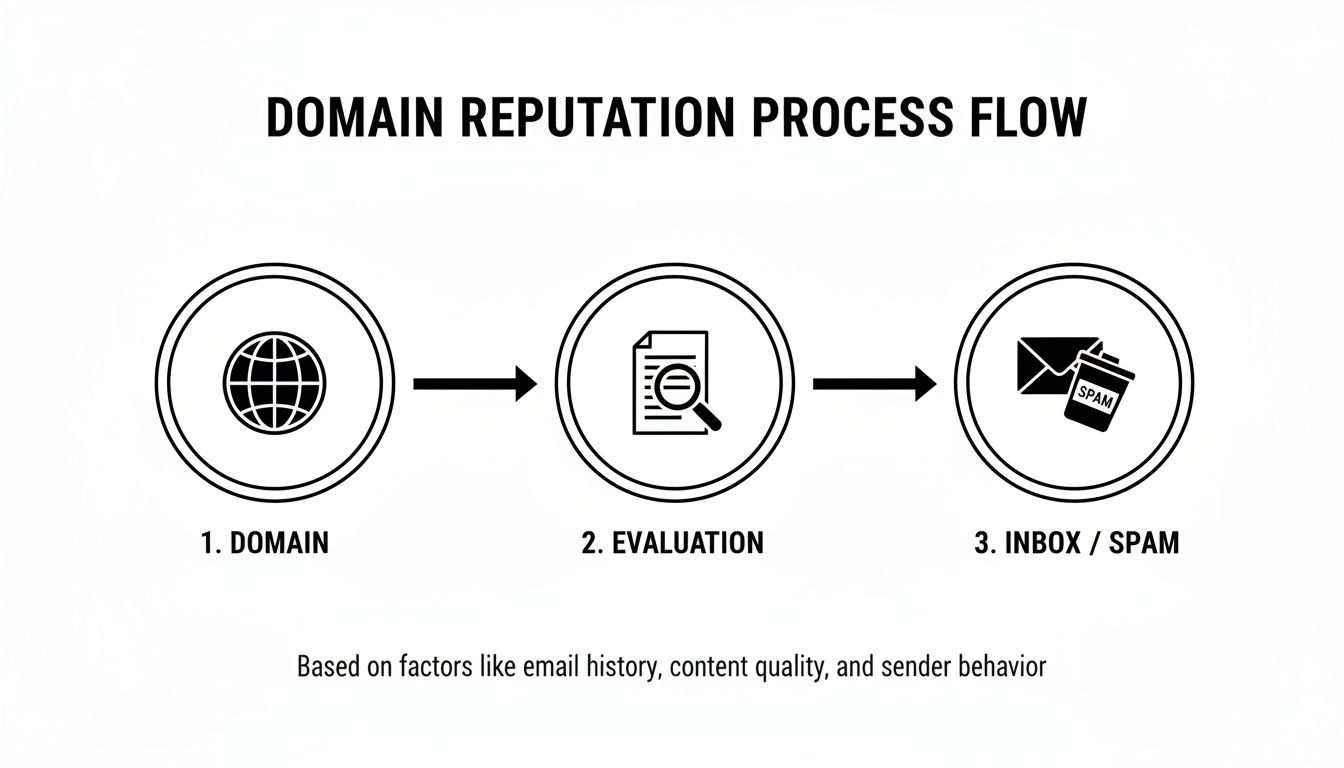
As you can see, every email you send puts your domain through an evaluation. The outcome of that evaluation is what determines your deliverability.
Using Blacklist Checkers
For this initial check, the go-to tool for most experts is MXToolbox. It’s an industry staple for a reason. It consolidates results from over 100 different Domain Name System Blacklists (DNSBLs), giving you a comprehensive report in just a few seconds.
All you have to do is pop your domain name into the search bar, and it gets to work, scanning against the very same lists that mailbox providers use to filter their incoming mail. Seeing a “Listed” status next to any of them is your cue to dig deeper.
Pro Tip: Don’t panic if you see your domain on one or two obscure lists. Focus on the heavy hitters: Spamhaus, Barracuda, and SURBL. These are the ones that have a real impact on big providers like Gmail and Microsoft 365. A listing on one of those is a five-alarm fire that needs your immediate attention.
How to Read the Results
Once the scan finishes, you’ll get a report. A green “OK” means you’re in the clear on that specific list. A red “Listed” means you’ve been flagged. But not all listings are created equal, and knowing the difference is crucial.
- Major Blacklists: Getting flagged by a top-tier list like Spamhaus indicates a serious problem. This could be anything from hitting spam traps (a major no-no) to a high volume of user complaints, or even a compromised server sending spam under your name.
- Minor Blacklists: Some smaller, less-influential lists can be overly aggressive and might flag you for minor, temporary issues. While you shouldn’t just ignore them, focus your energy on resolving the major listings first. They cause the most damage.
For a more detailed breakdown of the tools and processes involved, check out our guide on how to check if a domain is blacklisted.
This initial report is your roadmap. Knowing which lists have flagged your domain is the critical first step toward figuring out why it happened and, most importantly, how to get yourself delisted and back in good standing.
2. Check Your DNS Authentication Records

After you’ve checked the blacklists, it’s time to pop the hood and look at your domain’s technical setup. This is where the real trust-building happens. We’re talking about the three pillars of modern email authentication: SPF, DKIM, and DMARC.
Think of these as your domain’s official ID card. They prove to mailbox providers like Gmail, Outlook, and Yahoo that your emails are the real deal and not some clever forgery.
If these records are missing or, worse, misconfigured, it’s like sending a package with a smudged or missing return address. It’s an immediate red flag for receiving servers and one of the fastest ways to get your emails routed directly to the spam folder.
SPF and DKIM: The Dynamic Duo
Sender Policy Framework (SPF) is the first line of defense. It’s a simple text record in your DNS that publicly lists all the servers authorized to send email on behalf of your domain. It’s a straightforward way of saying, “Hey, if you get an email from mycompany.com, it should only be coming from one of these specific servers.”
DomainKeys Identified Mail (DKIM) adds a crucial layer of security on top of that. It attaches a unique digital signature to every email you send. The receiving server then checks this signature against a public key published in your DNS. It’s a cryptographic handshake that proves the email hasn’t been altered or tampered with along the way. To dive deeper, you can explore our complete guide explaining what is email authentication.
When these two aren’t set up correctly, you leave the door wide open for phishers and spammers to spoof your domain, sending malicious emails that look like they came straight from you.
Unchecked spam and phishing from look-alike domains directly erode the trust signals that determine whether your campaigns get delivered or junked. In a single recent quarter, over 1 million phishing attacks were observed, many hosted on domains crafted to mimic brands. Regularly checking your domains for DNS misconfigurations is your best defense.
DMARC: The Gatekeeper
Domain-based Message Authentication, Reporting, and Conformance (DMARC) is the final piece of the puzzle, and it’s a big one. DMARC tells receiving mail servers what to do if an email claims to be from you but fails either the SPF or DKIM checks.
With a DMARC policy in place, you can instruct servers to quarantine the suspicious email (send it to spam) or reject it entirely. It’s your way of taking control and protecting your brand’s reputation from being tarnished by impersonators.
Implementing DMARC is non-negotiable for building long-term trust with inbox providers. It also provides incredibly valuable feedback, sending you reports on who is sending email from your domain (or trying to). Any serious check for domain spam issues must include confirming that all three of these records are present and correctly configured.
Understanding Your Email Authentication Records
To help you get a handle on these technical but vital records, here’s a quick breakdown of what each one does and the common pitfalls I see all the time.
| Record | What It Does | Why It Matters for Spam Score | Common Mistake |
|---|---|---|---|
| SPF | Lists IP addresses authorized to send email for your domain. | Proves the sending server is legitimate. A missing or failed SPF check is a major spam flag. | Forgetting to add new email marketing platforms or third-party services to the record. |
| DKIM | Adds a digital signature to emails to verify they haven’t been altered in transit. | Confirms email integrity. A failed signature suggests tampering, a huge red flag for providers. | Using keys that are too short (1024-bit instead of the recommended 2048-bit) or misconfiguring the DNS entry. |
| DMARC | Tells receiving servers what to do with emails that fail SPF or DKIM checks. | Enforces your authentication policies and protects your domain from spoofing. | Setting the policy to p=none and never moving to quarantine or reject, which offers no real protection. |
Getting these three records right is a foundational step. It shows providers you’re a responsible sender who takes email security seriously, which goes a long way in keeping you out of the spam folder.
Analyzing Your Sending Habits and Engagement
Even if your technical setup is flawless, your day-to-day sending habits are what truly make or break your domain’s reputation. Think about it from the perspective of mailbox providers like Gmail and Outlook—they’re constantly watching how you behave. Your actions tell them whether you’re a legitimate sender or just more junk to filter out.
Poor sending practices will land you in the spam folder faster than anything else. If you have consistently high bounce rates, it’s a dead giveaway that you’re using old, unverified, or—worst of all—purchased email lists. That’s a massive red flag. Likewise, if your spam complaint rate starts creeping up, it’s a clear sign that people don’t want your emails, or that they felt tricked into signing up.
The Metrics That Really Matter
Your Email Service Provider’s (ESP) dashboard is packed with data, but you need to know which numbers to watch. Keeping a close eye on these key metrics will help you spot trouble long before it tanks your domain’s reputation.
- Bounce Rate: This is the percentage of your emails that never make it to the inbox. Hard bounces (from invalid addresses) are far more damaging than soft bounces (temporary delivery failures). If this number is high, you have a list quality problem.
- Spam Complaint Rate: When a real person clicks “This is Spam,” it sends a powerful negative signal directly to their provider. This is one of the most destructive metrics you can have.
- Open and Click-Through Rates: While not a direct spam signal, consistently low engagement is a slow-burn problem. It tells providers that your content isn’t valued, which can lead to your emails getting demoted to the Promotions tab or, eventually, the spam folder.
Regularly checking these email campaign performance metrics is non-negotiable for maintaining a healthy sender score. It’s what lets you stay ahead of problems instead of scrambling to fix them after the damage is done.
The Critical Role of a Domain Warm-Up
Got a new domain? Or maybe one that hasn’t been used for email in a while? You can’t just flip a switch and start blasting thousands of messages. That sudden spike in volume looks exactly like what spammers do, and you’ll get flagged in a heartbeat. This is where a proper domain “warm-up” becomes essential.
A warm-up is all about building trust. You start by sending a low volume of emails to your most engaged subscribers—the people you know will open and click. Then, you gradually increase that volume over several weeks. This steady, positive activity proves to mailbox providers that real people want your emails.
Spam isn’t just about sketchy domain names anymore. Attackers now weaponize brand-new domains at an incredible scale. With global domain registrations hitting 378.5 million, it’s a crowded field where a good reputation is everything. Some research even shows that spam activity is often concentrated around just a few domain registrars, so the “neighborhood” your domain lives in can affect its perceived trustworthiness.
This makes a careful, deliberate warm-up more crucial than ever. It’s how you prove you’re one of the good guys.
Building Your Domain Reputation Recovery Plan

Discovering your domain is blacklisted or has a poor reputation can feel like a gut punch. But don’t panic—it’s a fixable problem. Now’s the time to shift from diagnosis to action. This isn’t just about getting your name off a list; it’s about rebuilding trust with mailbox providers and ensuring your emails land where they belong for the long haul.
A solid recovery plan really comes down to two things. First, you have to address the immediate damage and request delisting. Second, you need to build a proactive monitoring routine to make sure this never happens again.
Let’s walk through exactly how to do both.
The Delisting Process: What to Say and Do
Before you even think about contacting a blacklist operator, you have to find and fix the root cause. I’ve seen it time and time again: people rush to request removal without solving the underlying issue. It’s a waste of time and can actually make future requests harder.
Once you’ve nailed down and corrected the problem—whether it was a misconfigured DKIM record, a compromised account sending spam, or a stale email list—then you can move on to the delisting request.
Here’s how that typically works:
- Go to the Source: Every blacklist, from Spamhaus to Barracuda, has its own specific delisting procedure. Head to their website and find their lookup or removal tool.
- Submit Your Details: You’ll need to enter the flagged domain or IP address. This is a crucial step because the results will often tell you why you were listed in the first place.
- Make Your Case: This is where you fill out their delisting form. Be honest, be professional, and get straight to the point.
When you fill out that form, clearly explain the steps you’ve taken to resolve the problem. Vague statements just won’t cut it. For example, don’t just say, “We fixed the issue.”
Instead, provide specific, confidence-building details.
“Our domain was listed due to a high volume of spam complaints originating from a compromised user account. We have since secured the account, reset all passwords, implemented two-factor authentication, and conducted a full security audit of our sending infrastructure to prevent future unauthorized access.”
This level of detail shows the blacklist operator you’ve taken the problem seriously and are committed to being a responsible sender. Most delisting requests are processed within 24-48 hours, but remember, rebuilding your reputation with major providers like Gmail is a marathon, not a sprint.
Establishing a Proactive Monitoring Routine
Getting delisted is only half the battle. To keep your domain healthy for good, you have to shift from putting out fires to preventing them. This means putting systems in place to catch problems before they spiral out of control.
Think of it like regular maintenance on your car. You don’t wait for the engine to seize up before you change the oil. A consistent routine keeps everything running smoothly and prevents costly breakdowns down the road.
Here’s a practical checklist to get you started:
- Keep Your Lists Squeaky Clean: Don’t let your email lists go stale. Before every major campaign, use an email validation service like Truelist to scrub your lists of invalid, inactive, and spam-trap addresses. This single step can dramatically reduce bounce rates and protect your sender score.
- Set Up Automated Alerts: Use tools like MXToolbox or EasyDMARC to set up ongoing monitoring for your domain. They can ping you the moment you appear on a blacklist or if your DMARC records detect suspicious activity.
- Review Engagement Metrics Weekly: Make it a non-negotiable habit to check your bounce rates, spam complaints, and open rates. A sudden spike in bounces or complaints is one of the earliest warning signs that something is wrong.
- Adopt Healthy Sending Practices: This is foundational. Always use double opt-in for new subscribers, make your unsubscribe link painfully easy to find, and be sure to warm up any new domains or IP addresses gradually.
By turning these actions into a routine, you transform from a reactive problem-solver into a proactive guardian of your domain’s health. You’ll spend a lot less time scrambling to check domain spam status and a lot more time connecting with an audience that actually wants to hear from you.
Got Questions About Domain Spam Scores? We’ve Got Answers.
When you’re deep in the weeds of domain reputation, a few common questions always seem to pop up. Let’s tackle some of the most frequent ones with practical, no-fluff answers.
How Long Does It Really Take to Fix a Bad Domain Spam Score?
Let’s be honest: fixing a bad reputation isn’t an overnight job. It’s more of a marathon than a sprint.
While you might get delisted from a specific blacklist within 24-48 hours after submitting a request, that’s just one piece of the puzzle. The real work is rebuilding trust with the big players like Gmail and Outlook, and that takes time.
You’re looking at a recovery process that can take several weeks, or even a couple of months. It all depends on how consistently you can show good sending behavior. This means you need to be doing everything right:
- Nailing down your technical setup (SPF, DKIM, and DMARC have to be perfect).
- Scrubbing your email list until it’s squeaky clean. Get rid of those invalid and risky addresses.
- Patiently re-warming your domain. Start small by sending to your most engaged subscribers first, then slowly build from there.
The biggest mistake you can make is rushing it. Jumping back into high-volume sends will just land you right back where you started.
Should I Use a New Domain for Cold Outreach?
Yes. One hundred percent. This is a standard best practice in the industry, and for good reason.
Think of it this way: your main corporate domain is a critical asset. It’s what you use for your most important communications with clients, partners, and your own team. Using a secondary, lookalike domain (like getcompany.com instead of the main company.com) for cold outreach acts as a firewall. It isolates the higher risks of cold emailing from your primary domain.
But here’s the catch: you can’t just buy a new domain and start firing off emails. You must warm it up properly. Sending a ton of emails from a brand-new domain is one of the fastest ways to get it flagged. Start with a flawless technical setup and ramp up your sending volume gradually over a few weeks.
Pro Tip: A separate, carefully warmed-up domain for outreach is your best insurance policy. It lets you connect with new prospects without putting your core business communications at risk.
Does My Email Content Actually Affect My Domain’s Spam Score?
It absolutely does. Think of your technical records as the foundation of your house—it has to be solid. But the content you send is what people (and mailbox providers) see every single day.
ISPs are constantly scanning for common spam triggers, including:
- Overloading emails with spammy words like “free,” “guaranteed,” or “act now.”
- USING ALL CAPS or too many exclamation points!!!
- Writing misleading subject lines that feel like clickbait.
- Having a bad image-to-text ratio (way too many images and not enough actual text).
Every time you send relevant, personalized content that people actually open and click, you’re building up positive reputation points. On the flip side, generic emails that get ignored or marked as spam will tear that reputation down just as quickly.
One of the surest ways to protect your domain reputation is to keep your email lists pristine. A high bounce rate is a massive red flag for mailbox providers. With Truelist, you can run unlimited email validations to make sure you’re only sending to real people who want to hear from you. This helps safeguard your sender score and gives your deliverability a serious boost.