 Claude
  Perplexity
Your Essential Domain Health Check Guide
Run a complete domain health check to boost your SEO, security, and email deliverability. Learn how to audit DNS, blacklists, and domain reputation.
TL;DR: Run a complete domain health check to boost your SEO, security, and email deliverability. Learn how to audit DNS, blacklists, and domain reputation.
Think of a domain health check as a routine physical for your company’s online presence. It’s a deep dive into your domain’s technical guts—DNS records, email authentication, and sender reputation—to catch problems before they turn into disasters like your website going down, emails getting blacklisted, or leaving the door open for security breaches.
Why Domain Health Is a Business Asset, Not an IT Chore
Your domain isn’t just an address on the web; it’s the foundation of your digital identity. Every time a customer searches for you, emails your team, or visits your website, they’re interacting with that domain. When it’s healthy, those interactions are smooth, secure, and successful. It just works.
But when it’s neglected, your domain can quickly become a serious liability. I’ve seen it happen time and time again: a simple, overlooked error in a DNS record sends an entire quarter’s worth of marketing emails straight to spam. That’s not a made-up story. It’s a real-world scenario that causes a direct, measurable hit to leads and sales—all from a tiny technical oversight.
Connecting Technical Guts to Business Growth
So, what does a “healthy” domain actually look like? It’s not about memorizing a bunch of acronyms. It’s about real, tangible business results. When you get serious about a domain health check, you’re shoring up critical parts of your operation:
- Website Uptime and Accessibility: Clean DNS records mean people can always find and load your site. No frustrating “site not found” errors.
- Email Deliverability: Proper email authentication (SPF, DKIM, and DMARC) is like showing your ID to Gmail and Outlook. It proves your messages are legit and keeps them out of the spam folder.
- Brand Reputation and Trust: A secure domain is your shield against phishing attacks where criminals try to impersonate your brand, which is key to protecting your customers’ trust.
- Revenue Protection: By keeping your site online and your marketing messages in the inbox, you’re actively protecting your revenue streams.
To give you a clearer picture, let’s break down the core components of a healthy domain.
The Core Pillars of Domain Health
This table gives a quick overview of the key areas in a domain health check and their direct impact on your business.
| Pillar | What It Protects | Business Impact |
|---|---|---|
| DNS Health | Website Accessibility & Stability | Prevents costly downtime and ensures customers can always reach you. |
| Email Authentication | Sender Reputation | Drastically improves email deliverability, boosting marketing ROI. |
| Blacklist Status | Brand Credibility | Avoids being blocked by email providers and security filters. |
| Domain Security | Customer Trust & Data | Protects against phishing, spoofing, and brand impersonation attacks. |
Looking at it this way, you can see how each technical pillar directly supports a vital business function. It’s all connected.
It’s no surprise that network and connectivity issues are behind 31% of all IT service outages. This stat really underscores just how fragile things can be if you’re not paying attention. Proactive monitoring isn’t just a good idea; it’s essential.
A common mistake is treating domain health as a purely technical, “set it and forget it” task. In reality, it’s an ongoing business practice that directly protects your ability to communicate with customers and generate revenue.
For a wider view on protecting your digital footprint, understanding why effective cyber security is an imperative is a great starting point. Your domain is often the first line of defense, making its health a cornerstone of any solid security strategy. By regularly auditing these elements, you shift domain management from a reactive headache into a powerful strategic advantage.
How to Audit Your DNS and Email Authentication
Think of your domain’s DNS (Domain Name System) as its digital address book. When someone types in your website, DNS tells their browser where to find it. When an email gets sent to you, DNS points it to the right server. A proper domain health check always starts here, making sure this address book is accurate and locked down.
Even a simple typo in your DNS records can make your website disappear from the internet or cause your emails to vanish into a black hole. The good news is, you don’t need to be a network engineer to run a spot-check on these critical settings.
Decoding Your Core DNS Records
Before we jump into the audit, let’s quickly get familiar with the main players. It helps to think of them as different types of entries in that digital address book:
- A Record: This is the most fundamental record. It points your domain name (like
yourcompany.com) directly to your server’s IP address—the actual street address for your website’s home on the internet. - CNAME Record: A “Canonical Name” record is basically an alias. It forwards one domain name to another, like a digital mail-forwarding service. A common example is pointing
blog.yourcompany.comover to the mainyourcompany.comsite. - MX Record: The “Mail Exchanger” record is all about email. It tells the world which specific mail servers are in charge of receiving emails for your domain.
This flow shows how all the pieces—DNS, email authentication, and security—fit together to keep your business running smoothly.
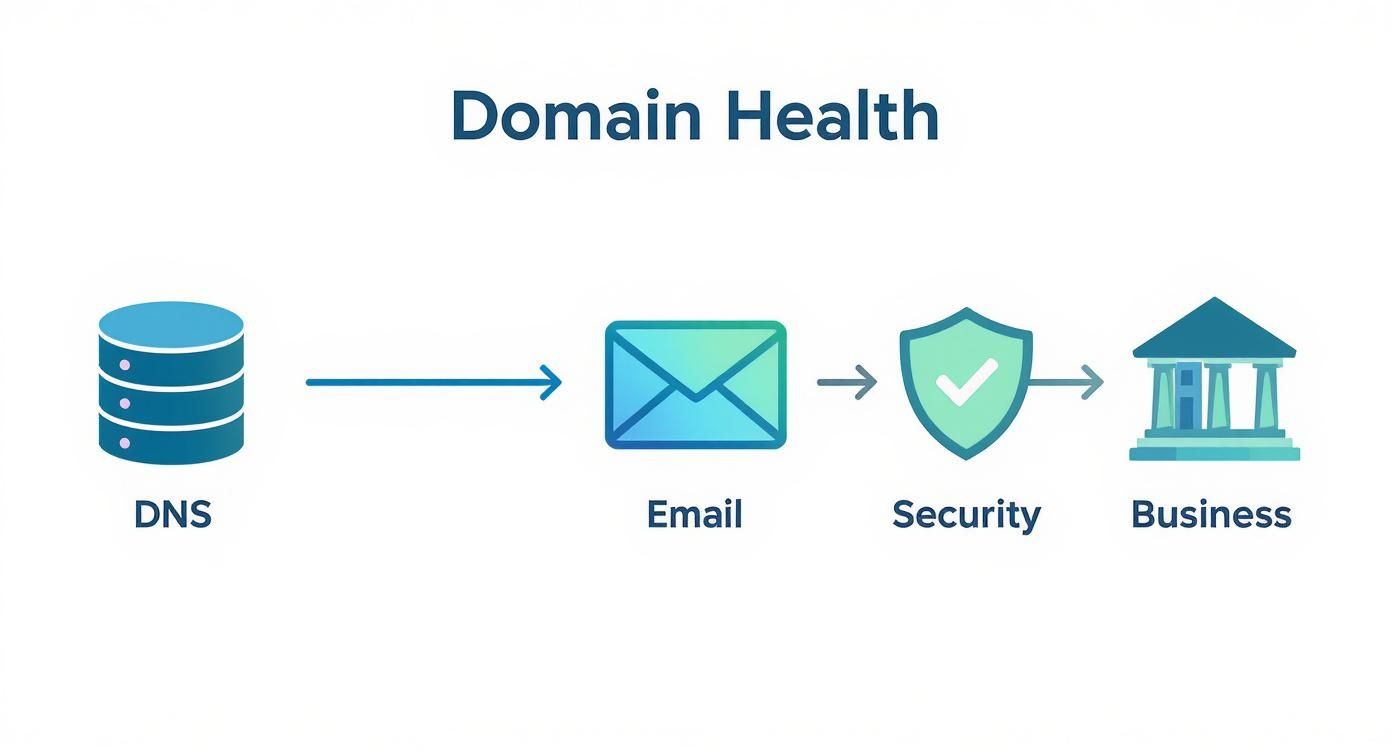
As you can see, a solid technical foundation isn’t just for IT; it directly impacts your company’s security and overall stability.
The Essential Trio of Email Authentication
While basic DNS records get traffic to the right place, email authentication records are what build trust. They’re how you prove to mailbox providers like Gmail and Outlook that an email saying it’s from you actually is from you. Without them, your messages have a much higher chance of getting flagged as spam or rejected completely.
An estimated 90% of businesses face DNS attacks every year, and many of those involve email spoofing—something proper authentication is designed to stop. This is where SPF, DKIM, and DMARC come in.
I’ve worked with companies that saw their email open rates double almost overnight simply by fixing their authentication records. Mailbox providers are increasingly strict; if you don’t verify your identity, they assume you’re a threat.
Sender Policy Framework (SPF)
An SPF record is essentially a public list of every server and IP address authorized to send email for your domain. Think of it like a bouncer’s guest list at a club. If a server tries to deliver an email from your domain but isn’t on the list, it doesn’t get in.
For example, if you only use Google Workspace for your company email, your SPF record will tell receiving servers to only trust emails coming from Google’s servers. Anything else is an imposter. For a broader view, it’s helpful to see how this fits into a full cyber security audit checklist for your business.
DomainKeys Identified Mail (DKIM)
If SPF is the guest list, then DKIM is a tamper-proof seal on the envelope. It works by adding a unique, encrypted digital signature to every email you send.
When another server receives your email, it uses a public key (which you publish in your DNS) to check that signature. A valid signature confirms two crucial things: the email really came from your domain, and nobody has messed with the contents along the way. This makes it incredibly difficult for bad actors to intercept and alter your messages.
Domain-based Message Authentication Reporting and Conformance (DMARC)
DMARC is the final piece of the puzzle. It’s the rulebook that ties SPF and DKIM together, telling other mail servers exactly what to do when an email fails one of those checks.
You set a DMARC policy to instruct them to:
- Do nothing: Just monitor the failures and send you reports (
p=none). - Quarantine: Send the sketchy emails straight to the recipient’s spam folder (
p=quarantine). - Reject: Block the failed emails entirely so they never get delivered (
p=reject).
Moving to a “reject” policy is the ultimate goal, as it provides the strongest defense against phishing and spoofing attacks where someone tries to impersonate your brand. If you want to dive deeper into how these protocols work, this guide on what is email authentication is a great resource.
Keeping Your Domain Off the Naughty List: Blacklist Monitoring and Removal
Getting your domain blacklisted is like a digital slap in the face. One minute, your emails are flowing smoothly; the next, it feels like someone bricked up the front door to your business. Your messages stop hitting inboxes, your sender reputation takes a nosedive, and your brand’s credibility is instantly on the line.
Knowing how to stay off—and get off—these lists is a non-negotiable part of any serious domain health audit.

So, what are these blacklists? They’re real-time databases that internet service providers (ISPs) and email clients use to identify and block spam. If your domain or sending IP address lands on a major player like Spamhaus or Barracuda, your deliverability can plummet to nearly zero almost overnight.
This isn’t just a headache for your marketing team. It can completely halt critical transactional emails, like password resets and order confirmations, from ever reaching your customers.
How Did We End Up Here? Why Domains Get Blacklisted
Landing on a blacklist is rarely a random act of fate. It’s almost always a symptom of a bigger problem with your email practices or a hole in your domain security. Pinpointing that root cause is the only way to find a permanent fix.
The usual suspects include:
- A sudden surge in email volume: If a new or quiet domain suddenly starts blasting out thousands of emails, it immediately looks suspicious to spam filters.
- High spam complaint rates: This one’s straightforward. If enough people hit the “spam” button on your emails, ISPs will start flagging your domain.
- Poor email list hygiene: Sending emails to a long list of invalid or dead addresses leads to a high bounce rate, which is another huge red flag for spam-like behavior.
- A compromised account: This is the silent killer. A single hacked employee account can be used to send out spam, quickly poisoning your entire domain’s reputation.
That last point is a real nightmare scenario. I once worked with a small e-commerce shop that saw its deliverability completely tank overnight. It turned out a single compromised sales account had been secretly spewing out thousands of phishing emails. Their entire domain was flagged as a threat, bringing all legitimate communication to a screeching halt.
How to Check Your Blacklist Status
Proactive monitoring is your best defense here. You need to know you’re on a list long before your customers start complaining that they aren’t getting your emails. Luckily, plenty of free tools are out there that make this a quick and easy part of your regular domain health check.
You just pop in your domain name or IP address, and these services scan hundreds of common blacklists for you. Think of it as a critical diagnostic scan.
Don’t ever think, “We’re not spammers, so we don’t have to worry about this.” That’s a dangerous assumption. A simple security mistake or a misconfigured server can land even the most reputable company on a major blocklist. Regular monitoring is essential.
Your Step-by-Step Guide to Getting Delisted
Finding your domain on a blacklist is stressful, but don’t panic. The removal process is usually pretty straightforward if you act quickly and methodically. Let’s walk through the exact steps that e-commerce client took to get back in the clear.
First, they identified and secured the source of the problem. This is the absolute first step. By digging into their server logs, they found the compromised account. They immediately changed the password and forced multi-factor authentication to lock the attacker out for good.
Next, they stopped all outbound email. They temporarily paused every single email campaign. This did two things: it stopped any further damage to their reputation and showed the blacklist operators they were taking the situation seriously.
With the spam fire put out, they requested delisting. They went directly to the websites of the blacklists that had flagged them, like Spamhaus. Every list has its own delisting process, but it usually involves filling out a form, explaining what happened, and detailing the corrective actions you’ve taken.
Finally, after getting the green light (which took about 48 hours), they gradually resumed sending. They didn’t just flip the switch back on. They started by sending to their most engaged subscribers first, slowly ramping up the volume over a few days. This allowed them to carefully rebuild their sender reputation with the ISPs.
This measured approach worked. Their deliverability was back to normal within a week. For a deeper dive into the nitty-gritty, our complete guide on email blacklist removal covers the entire process from start to finish.
Ultimately, turning blacklist monitoring into a routine task transforms a potential crisis into a manageable one, protecting your domain and your business.
Evaluating and Improving Your Domain Reputation
Getting your DNS and authentication records right is just the technical foundation. The real game-changer is your domain’s reputation—think of it as a digital credit score. Mailbox providers like Gmail and Outlook are constantly judging you based on this score, deciding whether your emails land in the primary inbox or get tossed into spam.
A stellar reputation is like a VIP pass to the inbox. A poor one gets you shown the door, fast.
This reputation isn’t based on a single metric. It’s a complex, ever-changing assessment based on dozens of signals. Are people actually opening your emails? Clicking your links? Or are they slamming that “mark as spam” button? Every single interaction helps shape how the big email gatekeepers see your domain.
Honestly, a great reputation is far more valuable than perfect technical settings. At the end of the day, mailbox providers care about one thing above all else: user engagement. They want to deliver emails their users actually want. Once you grasp that, you’ve got the key to mastering your domain’s health.
Free Tools to Monitor Your Reputation
The good news is you aren’t flying blind. The biggest mailbox providers give you a peek behind the curtain with free dashboards that show you exactly how they see your domain. The two you absolutely need to set up are Google Postmaster Tools and Microsoft’s Smart Network Data Services (SNDS).
Setting these up is a non-negotiable step in any serious domain health audit. The data they provide is invaluable and you simply can’t get it anywhere else.
- Google Postmaster Tools (GPT): This is your window into the Gmail world. It tracks your IP and domain reputation, keeps an eye on spam complaint rates, and tells you how well your authentication is working. It’s essential for anyone sending significant volume to Gmail addresses.
- Microsoft SNDS: This one focuses on the data for your sending IPs and how Outlook.com users are interacting with your mail. It gives you the dirt on things like junk mail rates and whether you’re hitting spam traps.
All it takes is adding a simple verification record to your DNS to unlock these diagnostic tools. It’s a small effort for a massive payoff, allowing you to see your domain through the eyes of the providers themselves.
Here’s a look at a Google Postmaster Tools dashboard tracking domain reputation over time.
This kind of visualization is gold. You can spot a downward trend in your reputation long before it becomes a full-blown deliverability crisis.
Actionable Tactics for Boosting Your Reputation
If you log in and find your reputation is in the red, don’t panic. It’s almost always fixable. Improving your domain’s standing is all about proving to mailbox providers that you’re a responsible sender who people actually want to hear from.
I see this all the time: a company gets a new IP, launches a huge new product, and immediately blasts their entire email list. To an ISP, that sudden spike in volume from an unknown source is a massive red flag. This is exactly why a proper “warm-up” process is critical.
Warming up an IP or domain means starting small. You send a low volume of emails to your most engaged subscribers first, then gradually ramp up the volume over a few weeks. This methodical approach builds a positive sending history and establishes trust.
Beyond warming up, here are a few other battle-tested strategies to build and protect your reputation:
- Segment Your Audience: Stop the email blasts. Send targeted campaigns to smaller groups based on their interests and how they’ve interacted with you before. This naturally leads to much higher open and click rates.
- Make Unsubscribing Easy: Hiding the unsubscribe link is one of the worst mistakes you can make. If someone can’t easily opt out, they’re far more likely to just mark you as spam—the single most damaging signal you can send.
- Clean Your Email Lists Regularly: Sending to dead or inactive email addresses just racks up bounce rates, which kills your reputation. Use a good validation service to keep your lists fresh and clean.
The global domain market has ballooned, with total registrations now at 378.5 million. That explosion means more competition for inbox space, and mailbox providers are getting stricter every day. A rock-solid sender reputation is what will set your emails apart from all that noise.
Ultimately, improving your sender score is an ongoing cycle of sending relevant content, monitoring engagement, and practicing good list hygiene. To dive deeper, check out our guide on how to improve your email sender reputation score and keep your domain in the clear.
Building Your Proactive Domain Health Strategy
Running a one-time domain health check is a great starting point, but it’s really just a snapshot in time. Think of it like a single checkup with your doctor—it tells you how you are today, but it doesn’t guarantee your health tomorrow. The real power comes from moving away from a reactive, fire-fighting mode and embracing a proactive, continuous monitoring strategy.
This is the shift that separates the businesses that thrive from those constantly dealing with preventable crises. When you’re proactive, domain management becomes a competitive advantage, not just another task on a forgotten checklist. You’ll be spotting the warning signs long before they ever impact your customers or revenue.
Establishing a Monitoring Cadence
The key to making this work is to build a simple, repeatable routine. Consistency is everything. You don’t need a complex system, just a schedule that ensures nothing important falls through the cracks.
Here’s a practical rhythm you can adapt for your own team:
- Weekly Scans: Take a few minutes to run quick checks on your domain’s blacklist status. There are plenty of free online tools for this, and it’s your fastest way to know if your domain or IPs have been flagged.
- Monthly Reviews: This is when you should dig into your DMARC aggregate reports. These are goldmines of information, showing you who is sending emails from your domain—both the good and the bad. This is often where you’ll spot misconfigured services or active spoofing attempts.
- Quarterly Audits: Set aside time for a more thorough review of your DNS records. It’s digital housekeeping. You’ll want to hunt for old, unnecessary records and double-check that your SPF, DKIM, and MX settings are still accurate and optimized.
This cadence creates a system of early warnings. Trust me, it’s far easier to fix a minor reputation dip you caught in a monthly review than it is to recover from a full-blown blacklist that’s been silently killing your deliverability for weeks.
Automated Monitoring Versus Manual Checks
As your operations grow, running all these checks by hand can start to feel like a real chore. This brings you to a common crossroads: do you automate with a paid service, or do you keep handling it in-house? There’s no single right answer; it really depends on your team’s size, technical chops, and budget.
Let’s break down how the two approaches stack up.
| Aspect | Manual Approach (DIY) | Automated Services |
|---|---|---|
| Cost | Free (using online tools) | Monthly or annual subscription fee |
| Time Investment | Requires dedicated weekly/monthly time | Minimal; systems run in the background |
| Alerts | Relies on someone remembering to check | Provides real-time, instant notifications |
| Expertise Level | Requires a basic understanding of DNS | Often provides guided fixes and support |
For a small business or startup, a disciplined manual approach can work just fine. But as your email volume and complexity ramp up, the value of getting real-time alerts from a dedicated service often delivers a massive return on investment, especially when you factor in the cost of a missed problem.
A proactive strategy is less about having complex tools and more about having a clear plan. Knowing who to call and what steps to take the moment an issue is flagged is more valuable than any piece of software.
Creating a Simple Incident Response Plan
Even with the best monitoring in place, things can still go wrong. A server gets misconfigured, a security breach happens—it’s part of doing business. When it does, the last thing you want is a team-wide scramble to figure out who does what.
This is where a simple, one-page response plan becomes invaluable. It doesn’t need to be some 20-page document. At a minimum, it just needs to answer three questions:
- Who is the point person for a domain-related alert? This could be your IT manager, a developer, or an outside consultant. Name a person.
- What are the immediate first steps? For a blacklist issue, for example, the first step is often to pause outbound email campaigns to stop the bleeding.
- Who has the credentials to make changes? You need to know exactly who has access to your domain registrar and DNS provider to push a fix live.
Having this clarity beforehand allows for a swift, organized response that minimizes downtime and protects your brand reputation. With the domain market’s value surging to $2.35 billion, driven by new technologies, protecting these digital assets has never been more critical. Proactive management ensures your domain remains a secure and powerful tool for growth. You can discover more insights about how AI and blockchain are reshaping the future of digital real estate to stay ahead of the curve.
A Few Common Questions About Domain Health
Once you start digging into domain health, a few questions always seem to pop up. It’s one thing to run an audit, but it’s another to manage this stuff in the real world. Let’s tackle some of the most practical questions I hear from people trying to keep their sending reputation in top shape.
How Often Should I Really Be Checking on This?
This is probably the most common question, and the answer isn’t a simple “once a quarter.” Think of it more like maintaining a car. You don’t just take it for its annual service; you keep an eye on the tire pressure and oil levels more often.
Your domain needs a similar rhythm. While a deep-dive audit every few months is a great idea, some parts need more constant vigilance. Your blacklist status, for example, is something you should be checking weekly. Getting unexpectedly listed can shut down your email overnight, and a quick check is a tiny bit of effort that can save you a massive headache.
How Long Does It Take to Fix a Bad Domain Reputation?
If you’ve found yourself in a tough spot with a poor reputation, the big question is always, “How long until we’re back to normal?” The honest answer is, it depends. You’re essentially rebuilding trust with mailbox providers like Gmail and Microsoft, and that doesn’t happen with a single fix.
For minor dings, you might see positive changes within a few weeks of good sending. But for something more serious, like a major blacklisting or a long history of spam complaints, you should plan for a recovery period of one to three months. It takes that long to show a consistent, sustained pattern of sending emails that people actually want and engage with.
The most important thing to remember is that recovery is less about technical perfection and more about consistent user engagement. Mailbox providers reward senders whose emails get opened and clicked. That’s the ultimate signal that you’re sending valuable content.
This recovery timeline is exactly why being proactive is so crucial. It’s always faster, cheaper, and less stressful to prevent a reputation problem than it is to claw your way out of one.
Does Changing My Domain Registrar Affect My Domain Health?
This is a great technical question. The short answer is no—simply moving your domain from a registrar like GoDaddy to Namecheap, for example, does not directly impact your domain’s health or reputation. Your reputation is tied to the domain name itself and your sending IPs, not the company you pay to register it.
But, and this is a big but, the process of moving can absolutely cause problems if you’re not careful.
Here’s where things can go wrong:
- DNS Record Mishaps: You have to make sure every single one of your DNS records—your A, MX, SPF, DKIM, and DMARC records—is copied over perfectly to the new registrar. One typo or a forgotten record can bring down your website or, more likely, break your email authentication.
- Nameserver Delays: When you switch your nameservers to the new provider, there’s a propagation period where the change is spreading across the internet. This is usually quick, but it’s a vulnerable moment.
The move itself is harmless, but a sloppy transfer can create very real, albeit temporary, health issues. I always tell people to treat it like moving to a new house. The house is fine, but you need to be absolutely sure you brought all your keys and set up mail forwarding correctly to avoid any disruptions. Double-check everything before you flip the switch, and then check it all again after.
Ready to stop guessing and start knowing your true email list quality? Truelist offers accurate email validation to keep your lists clean, your sender reputation high, and your messages in the inbox. Begin validating for free today and see the difference.