
 Claude
  Perplexity
A Developer's Guide to Email Validation for JavaScript
Master email validation for JavaScript with our guide to regex, API checks, and modern best practices. Improve data quality and user experience.
TL;DR: Master email validation for JavaScript with our guide to regex, API checks, and modern best practices. Improve data quality and user experience.
When we talk about email validation in JavaScript, we’re really talking about a process of checking if an email address looks right and is likely to actually work before a user even submits a form. It’s an instant check that happens right in their browser, usually by combining simple HTML5 attributes, more complex regular expressions (regex), and sometimes even real-time API calls to get the job done. The whole point is to catch typos and garbage entries on the spot.
Why Client-Side Email Validation Is Non-Negotiable
Putting solid email validation in place isn’t just a nice-to-have technical detail; it’s a core business practice. It directly shapes the user experience, safeguards your data quality, and protects your all-important sender reputation.
Think about it from a user’s perspective. You’ve just signed up for something, but a tiny slip of the finger—typing “user@gmal.com” instead of “gmail.com”—means you’ll never see that welcome email, order confirmation, or critical password reset link. That’s a frustrating, broken experience.

For a business, the fallout is even worse. Bad email addresses pollute your CRM with dead-end leads, completely throw off your marketing analytics, and start to wreck your sender reputation. When your emails keep bouncing, providers like Google and Microsoft notice. Soon enough, your perfectly legitimate messages start landing in the spam folder.
The Real-World Impact of Poor Validation
Catching these mistakes instantly in the browser with JavaScript gives you some serious advantages:
- Improves User Experience: Users get immediate feedback and can fix their own mistakes without the headache of submitting a form, waiting for a page to reload, and then seeing an error.
- Enhances Data Integrity: You ensure that the data flowing into your systems is clean from the very beginning. This makes your sales and marketing teams far more effective.
- Reduces Server Load: You stop blatantly incorrect data from ever hitting your server, which saves processing power and resources.
The bottom line is that effective client-side validation acts as your first line of defense. It transforms a simple web form from a potential data-entry disaster into a reliable tool for customer engagement and data collection.
This process is so vital that the email verification market was valued at $5.243 billion in 2023 and is projected to nearly double. With global email volume constantly climbing and deliverability hovering at just 83.1%, proactive validation is the only way to keep your messages from vanishing into the void. You can learn more about the email verification market growth to see just how critical this has become.
Your First Layer of Defense With HTML5
The easiest way to get started with email validation is, funnily enough, to not write any JavaScript at all. Modern browsers have powerful, built-in validation features baked right into HTML5, making it the perfect first line of defense for any web form.
All you have to do is set an input field’s type attribute to “email”. This one small change tells the browser to automatically perform a basic format check. It’s a simple but effective way to catch obvious typos and nonsensical entries right away, ensuring the input at least has an ”@” symbol and a domain. This stops things like “usergmail.com” before the data ever hits your server.

Providing Instant Visual Feedback
You can take this native browser behavior a step further with just a little CSS to create a much better user experience. Using the :valid and :invalid pseudo-classes, you can give people immediate visual cues about whether their input is correct.
Here’s a quick and easy way to style it:
/* Style for an invalid email input */
input[type="email"]:invalid {
  border-color: #e53e3e; /* Red border for errors */
  box-shadow: 0 0 0 1px #e53e3e;
}

/* Style for a valid email input */
input[type="email"]:valid {
  border-color: #38a169; /* Green border for success */
}
This simple snippet gives users instant, intuitive feedback. A green border appears when the format looks right, while a red one lets them know they need to fix something. It’s a small detail that makes a big difference in form usability, and you haven’t had to write a single line of JavaScript.
But—and this is a big but—you have to remember its limitations. HTML5 validation is purely a surface-level check. It can tell you if an address looks like
user@domain.com, but it has zero idea if that domain actually exists or if the mailbox can receive email.
Think of browser-based validation as the bouncer at the door. It’s great for weeding out the obvious problems and improving the immediate user experience, but it’s not the complete security detail. For truly reliable data, you’ll need to layer more sophisticated validation techniques on top of this foundation.
Using Regular Expressions for Better Accuracy
While HTML5 validation is a great first line of defense for catching typos, it’s a pretty blunt instrument. It doesn’t give you much control. When you need more precision to define what a valid email format looks like, it’s time to bring in regular expressions (regex).
Regex is a powerful tool for pattern matching, letting you define exactly what an email address should look like before your form accepts it.
The problem? A quick search for an “email regex” will throw a million different patterns at you, and frankly, most of them are terrible. Some are so strict they reject perfectly valid emails, while others are monstrously long, trying to perfectly match the official RFC 5322 specification. Trust me, trying to achieve perfect RFC compliance in client-side JavaScript is a fool’s errand. The goal isn’t perfection; it’s practical, effective validation that works for 99% of real-world cases.
A Practical and Reliable Regex Pattern
Instead of grabbing some random snippet from a forum, let’s use a regex that’s been battle-tested. This one strikes the right balance between being accurate and not so complex that it slows things down.
Here’s a reliable regex for email validation for javascript that I’ve used on many projects:
const emailRegex = new RegExp(
  /^[a-zA-Z0-9._%+-]+@[a-zA-Z0-9.-]+.[a-zA-Z]{2,}$/
);
So, what’s it actually doing? Let’s break it down:
^[a-zA-Z0-9._%+-]+: This first part looks at the “local part”—everything before the@. It allows letters, numbers, and a handful of common special characters like periods, underscores, and hyphens.@: This just makes sure there’s an ”@” symbol. Simple enough.[a-zA-Z0-9.-]+: Next, it checks the domain name itself, again allowing for letters, numbers, periods, and hyphens.\.[a-zA-Z]{2,}: Finally, this bit looks for the top-level domain (like.comor.org). It ensures there’s a period followed by at least two letters.
You can wrap this logic in a clean, reusable JavaScript function like this:
function isValidEmail(email) {
  const emailRegex = new RegExp(
    /^[a-zA-Z0-9._%+-]+@[a-zA-Z0-9.-]+.[a-zA-Z]{2,}$/
  );
  return emailRegex.test(email);
}

// How it works in practice:
console.log(isValidEmail("test@example.com")); // true
console.log(isValidEmail("test@example"));   // false
Comparing Client-Side Validation Methods
When you’re deciding how to handle email checks on the front end, you’re usually choosing between the browser’s built-in features and writing your own logic with JavaScript and regex. Here’s a quick rundown to help you decide.
| Method | Pros | Cons | Best For |
|---|---|---|---|
| Basic HTML5 | Extremely easy to implement (type="email"). No JavaScript required. | Very basic checks. Browser-dependent implementation. Limited control over the error message and styling. | Simple forms, prototypes, or situations where a basic check is sufficient. |
| JavaScript with Regex | Highly customizable. Gives you full control over the validation logic. | Requires writing and testing code. A bad regex pattern can reject valid emails or accept invalid ones. | Forms where you need more precise format control and a custom user experience. |
Ultimately, using JavaScript and a well-crafted regex gives you far more control and reliability than relying on the browser’s default behavior.
Understanding the Limits of Regex
Using a regular expression is a huge improvement over basic HTML5 checks. It gives you far more granular control over what you consider a valid email format. For a much deeper dive into the nuances, you can explore our guide on JavaScript email validation regex.
Crucial Takeaway: A regex can only verify the syntax of an email address. It confirms the string looks like an email, but it has absolutely no idea if the domain is real, if the mailbox actually exists, or if you’re dealing with a temporary, disposable address.
Think of regex as a grammar check for emails. It makes sure the sentence is structured correctly, but it can’t tell you if the words are true. For that, you need something that can go a step further and actually verify the address in real-time.
The Ultimate Solution: Real-Time API Verification
Client-side checks with HTML5 and regex are a solid first line of defense, but they have a massive blind spot: they only check an email’s format. They have no idea if the domain example.com is real, if it’s a temporary email service, or if the test@ mailbox actually exists.
This is where real-time API verification comes in. It’s the definitive solution for confirming an email is not just well-formed, but actually deliverable.
An email validation API acts as an instant background check. When your JavaScript code pings the API with an email address, it kicks off a series of deep verification steps that are impossible to run from a user’s browser due to security and technical constraints. This simple step transforms your form from a basic syntax checker into an intelligent gatekeeper.
How API-Based Validation Works Under the Hood
When you make an asynchronous call to a service like Truelist, you’re doing much more than matching a pattern. The service performs a multi-layered analysis to give you a clear, actionable result.
- Syntax and Format Check: It starts with a sophisticated format validation, far more robust than a simple regex can ever be.
- Domain Verification: The API confirms the domain exists and is properly configured to receive emails.
- Mailbox Existence Check: It communicates directly with the mail server to see if the specific mailbox (the part before the
@) is active and can accept messages. - Disposable Address Detection: It checks the domain against a massive, constantly updated database of known temporary and disposable email providers.
This powerful combination provides a level of certainty that client-side methods alone can never hope to achieve.
Integrating the Truelist API with JavaScript
Let’s walk through a practical example of how to implement email validation for javascript using an API. We’ll use the native fetch() function to make an asynchronous request to the Truelist API right from our web form.
First, you’ll need to get an API key from Truelist. A quick word of advice: always handle your keys securely. You don’t want to expose them directly in your client-side code in a production environment.
Here’s a basic function that takes an email address, sends it to the Truelist API, and processes the response:
async function validateEmailWithAPI(email) {
  const apiKey = 'YOUR_TRUELIST_API_KEY'; // Replace with your actual API key
  const url = `https://api.truelist.io/v1/verify/email?email=${encodeURIComponent(email)}&key=${apiKey}`;

  try {
    const response = await fetch(url);
    const data = await response.json();

    // Now, let's interpret the results
    return handleApiResponse(data);
  } catch (error) {
    console.error('API validation failed:', error);
    // Handle network errors gracefully
    return 'error';
  }
}

function handleApiResponse(data) {
  // Check the 'state' property of the API response
  switch (data.state) {
    case 'valid':
      console.log('Email is valid and deliverable.');
      return 'valid';
    case 'invalid':
      console.log('Email is invalid.');
      return 'invalid';
    case 'disposable':
      console.log('This is a disposable email address.');
      return 'disposable';
    default:
      console.log('Email status is unknown.');
      return 'unknown';
  }
}
This asynchronous approach is great because it keeps your UI responsive. The user isn’t stuck waiting while the check happens quietly in the background.
By interpreting the
statefrom the API’s JSON response, you can provide precise, user-friendly feedback. Instead of a generic “Invalid email,” you can tell the user if the address is disposable or simply doesn’t exist. To explore more advanced features, you can read our guide on the email checker API.
This level of detail is a game-changer for businesses that depend on high-quality email data. There’s a reason data validation services are projected to become a $4.828 billion market by 2025—they solve an incredibly expensive problem.
With average email deliverability hovering around just 83.1%, businesses lose a massive chunk of their communications. This hits everything from sales outreach to customer support. You can discover more insights on data validation trends and their market impact. Real-time API verification is the key to pushing your deliverability into that 95%+ range of excellence.
Building a Production-Ready Validation Workflow
So, how do you tie all this together in a real-world application? The secret is to build a smart, multi-layered strategy that’s quick for the user but tough on bad data. A production-ready email validation workflow in JavaScript never hangs its hat on a single method. Instead, it blends the immediate feedback of client-side checks with the undeniable accuracy of a server-side API.
The whole point is to give users instant feedback on obvious typos while saving the heavy-duty, network-intensive API calls for when they’re actually needed. This layered approach prevents a storm of unnecessary API requests, which saves you money and keeps the user experience snappy. It all starts with a basic syntax check, and only if that passes do we move on to the definitive API verification.
This diagram breaks down the flow of an API-powered validation process, from the moment a user types into a form to the final result.
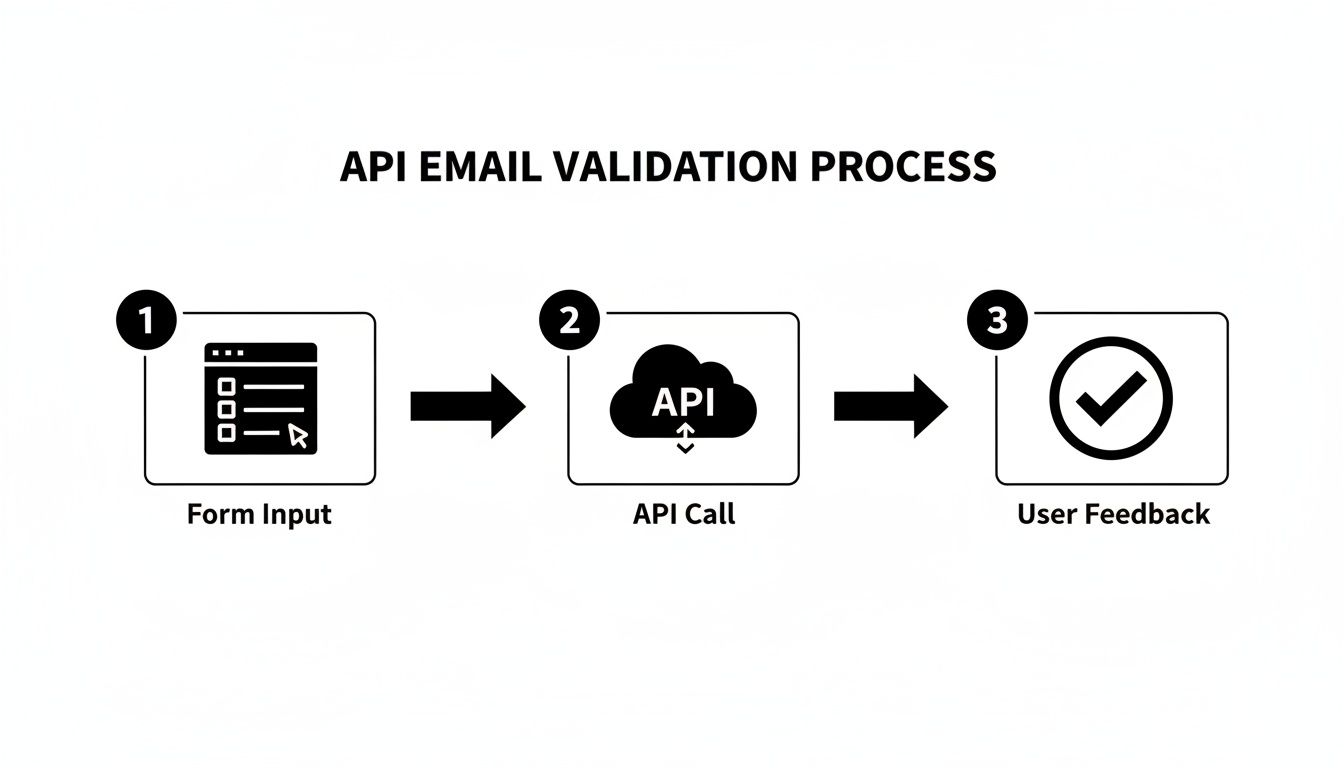
The real beauty here is its efficiency. The API call is only triggered after the initial, lightweight format check gives a thumbs-up. This creates a validation cycle that’s both fast and cost-effective.
Implementing an Efficient Workflow
One of the most common mistakes I see is firing off an API request on every single keystroke. This is a terrible idea—it’s inefficient, burns through your API quota, and creates a clunky user experience. A much smarter approach is to use a technique called debouncing.
Debouncing is simple: you delay running a function until a certain amount of time has passed without any new input. For our use case, this means waiting until the user pauses their typing (say, for 500 milliseconds) before we trigger the validation logic.
This simple trick prevents a flurry of useless API calls for an incomplete address like “user@” and waits until the user has likely finished typing the full email.
Managing User Feedback and API Keys
While your code is off talking to the validation API, your user shouldn’t be left staring at a frozen screen. It’s crucial to provide clear visual feedback. Think of a small loading spinner inside the input field or a subtle “Verifying…” message. This simple cue tells the user that something is happening and that they should wait a moment.
On a more critical note, you have to protect your API keys. Never, ever embed your secret API key directly in your client-side JavaScript. If you do, it’s exposed for anyone to find and abuse. The right way to handle this is to set up a simple backend proxy or a serverless function. Your frontend sends the email to your server, which then securely adds the API key and forwards the request to the validation service.
A production-ready workflow is as much about user experience and security as it is about the validation logic itself. Debouncing, clear loading states, and secure key management are what separate a proof-of-concept from a professional implementation.
Poor validation isn’t just a technical problem; it’s a business one. It’s a key reason why over 10% of emails in the US land in spam, which can cripple outreach campaigns. That’s why the market for email deliverability tools, which often rely on these real-time JavaScript checks, is projected to hit $1.9 billion by 2030. These tools help businesses push their inbox placement rates toward the 95%+ benchmark of excellence.
Handling Errors and Edge Cases
Finally, a truly robust system is built to handle failure. What happens if the user’s internet connection drops? What if the validation API is temporarily down? Your code needs to anticipate these curveballs and react gracefully.
Always wrap your fetch() calls in try...catch blocks to manage network errors or unexpected API responses. If a call fails, don’t just let the app crash. Instead, display a helpful message like, “Could not verify email. Please try again later.” You could even temporarily fall back to relying only on the regex check to keep your form functional. This ensures your application remains usable even when external services aren’t cooperating.
For a deeper look at creating these kinds of comprehensive strategies, check out our complete guide on email verification best practices.
Common Questions About JavaScript Email Validation
Even when you have a solid plan, you’re bound to run into a few tricky spots once you start coding. When it comes to building out email validation for javascript, the real challenge is striking the right balance between a smooth user experience, solid security, and genuine accuracy.
Let’s dig into some of the most common questions and sticking points developers face and get you some clear, practical answers.
What Is the Best Regex for Email Validation in JavaScript?
The hunt for one “perfect” regex is a classic developer trap. The truth is, there isn’t one. Trying to account for every single RFC 5322 edge case results in a monstrously complex pattern that’s slow and nearly impossible to maintain. For day-to-day use, a pragmatic approach is much more effective.
I’ve found this pattern to be a reliable workhorse for most projects:
^[a-zA-Z0-9._%+-]+@[a-zA-Z0-9.-]+\.[a-zA-Z]{2,}$
It does a great job of confirming the basic local-part@domain structure without rejecting valid, common email formats.
But—and this is a big but—you have to understand its limits. A regex is just a syntax checker. It can’t tell you if a domain is fake, if the address is from a throwaway service, or if the mailbox is full. It’s your first line of defense, not the final word. For real validation, an API check is the necessary next step.
Can JavaScript Check if an Email Address Actually Exists?
Straight up: no. JavaScript running in a user’s browser cannot, on its own, tell you if an email address is real and can receive mail. This is a very common misconception.
Verifying an email’s existence is a server-side job. It involves looking up MX records and communicating with mail servers—actions that are blocked in browsers for very good security and technical reasons.
So, how do you do it? Your client-side JavaScript should make an asynchronous call to a dedicated email validation API. A service like Truelist handles all the complex backend gymnastics and sends back a simple, clear status. This is the only truly reliable way to confirm an email’s deliverability from the frontend.
How Do I Securely Handle API Keys in Client-Side JavaScript?
This is a security question I see all the time, and it’s absolutely critical to get it right. You must never, ever embed your API keys directly in your client-side JavaScript. If it’s in your JS file, it’s public. Anyone can open their browser’s developer tools, find your key, and start using it on your dime.
The correct and secure way to handle this involves creating a simple proxy on your backend.
- Build a simple endpoint on your server. This could be a traditional server route or a lightweight serverless function (using something like Netlify Functions, AWS Lambda, or Vercel Functions).
- Point your frontend to your endpoint. Instead of calling the validation API directly from the browser, your JavaScript sends the email address to your own server.
- Your server does the real work. Your backend code receives the request, pulls your API key from a secure environment variable, and then makes the call to the validation service.
This setup acts as a middleman, ensuring your secret API key never leaves the safety of your server environment.
Ready to build a validation workflow you can actually trust? With Truelist, you get unlimited, real-time email verification to make sure every single address is valid and deliverable. Start validating for free today at Truelist.io and see what a difference clean data makes.