
 Claude
  Perplexity
Mastering JavaScript Valid Email Checks A Practical Guide
A complete guide to JavaScript valid email implementation. Learn robust regex, client-side techniques, and advanced validation for better user experience.
TL;DR: A complete guide to JavaScript valid email implementation. Learn robust regex, client-side techniques, and advanced validation for better user experience.
Validating email addresses in JavaScript is a core skill for any web developer. The go-to method is usually testing what a user types against a Regular Expression (Regex) pattern. This simple, client-side check gives users instant feedback, which is great for the user experience and stops badly formatted data before it even gets to your server.
Why Instant Email Validation Is A Non-Negotiable

We’ve all been there. You fill out a long sign-up form, click “Submit,” and then it tells you the email address is wrong. It’s frustrating, and honestly, a lot of people will just leave at that point. This is exactly what client-side javascript valid email checks are meant to fix. By telling someone right away if there’s a problem, you turn a potential headache into a smooth, helpful interaction.
If you only validate on the server, you’re creating a clunky, slow feedback loop. All that data has to travel to your server and back just to tell the user they typed ”user@gamil.com” instead of ”user@gmail.com.” That’s a waste of everyone’s time, not to mention your server resources.
The Business Case for Client-Side Checks
Instant validation isn’t just about good manners; it’s good for business. A better user experience leads directly to higher conversion rates. When people get real-time help filling out a form, they’re far more likely to finish what they started, whether that’s signing up, creating an account, or making a purchase.
By catching errors before a form is submitted, you create a frictionless path for the user. This simple step can dramatically reduce form abandonment rates and improve the overall quality of data entering your system.
Think about the direct benefits of putting these immediate javascript valid email checks in place:
- Improved User Experience: People get feedback in the moment, letting them fix mistakes without waiting for the page to reload.
- Reduced Server Load: You stop pointless network requests from happening. Why waste server power and bandwidth on obviously bad data?
- Cleaner Data: Basic typos and formatting mistakes are caught before they ever pollute your database. This means better quality leads and user info from the start.
- Higher Conversion Rates: A quick, error-free sign-up process encourages more people to complete it. That’s a direct win for your growth and engagement goals.
Ultimately, a good client-side check is your first line of defense. It protects your data quality and keeps users happy, setting the stage for more advanced server-side verification, which we’ll get into later on.
Building Your Foundation With Regex Validation

When you’re trying to figure out if an email is valid in JavaScript, your first thought is probably Regular Expressions, or Regex. It’s the classic approach for a reason. A regex is just a sequence of characters that defines a search pattern, and you can use it to quickly check if a user’s input looks like a real email address.
Think of it as a bouncer at a club checking an ID. They aren’t running a full background check; they’re just making sure the ID has the right format—a photo, a name, an expiration date. Regex does the same thing for an email. It’s looking for the basics: a username, the ”@” symbol, and a domain name.
Deconstructing a Common Regex Pattern
Let’s pull apart a widely-used regex pattern. It might look like a jumble of symbols at first glance, but each piece has a very specific job.
function isValidEmail(email) {
  // A commonly used regex pattern for email validation.
  const emailRegex = new RegExp(
    /^[a-zA-Z0-9._-]+@[a-zA-Z0-9.-]+.[a-zA-Z]{2,6}$/
  );

  // Test the email against the pattern.
return emailRegex.test(email); }
// Example usage:
console.log(isValidEmail("test@example.com")); // true
console.log(isValidEmail("test.user@example.co.uk")); // true
console.log(isValidEmail("test@.com")); // false
This pattern—/^[a-zA-Z0-9._-]+@[a-zA-Z0-9.-]+\.[a-zA-Z]{2,6}$/—is a solid starting point for most projects. It has been battle-tested on countless forms across the web. It’s great at catching obvious mistakes like user@.com while correctly allowing valid formats like user@example.com.
Key Takeaway: A simple regex is your first line of defense. It’s incredibly fast, runs entirely in the browser, and nips the most common typos in the bud without ever having to call your server.
Putting Your Regex Function to Work
Wrapping this logic into a reusable function is a smart move. Once it’s defined, you can call it anywhere you need a quick email check, which is usually right when a user tries to submit a form.
Here’s how you could wire it up to a simple HTML signup form:
<form id="signup-form">
  <label for="email">Email:</label>
  <input type="email" id="email" name="email">
  <p id="error-message" style="color: red;"></p>
  <button type="submit">Subscribe</button>
</form>
With the HTML in place, the next step is to add a bit of JavaScript. We’ll listen for the form’s “submit” event, stop it from sending right away, and run our validation function first. This lets us give the user helpful, instant feedback.
document.getElementById('signup-form').addEventListener('submit', function(event) {
  event.preventDefault(); // Stop the form from submitting

  const emailInput = document.getElementById('email');
  const errorMessage = document.getElementById('error-message');
  const email = emailInput.value;

  if (isValidEmail(email)) {
    errorMessage.textContent = '';
    // Form is valid, proceed with submission or other logic
    console.log('Email is valid!');
    // this.submit(); // Uncomment to submit the form
  } else {
    errorMessage.textContent = 'Please enter a valid email address.';
    console.log('Email is invalid!');
  }
});
This is a much better user experience than letting them submit the form only to get an error page. For more advanced needs, you can explore a variety of other JavaScript email validation regex patterns in our detailed guide to find the perfect fit for your project.
Better UX Through Live Validation
Waiting to validate an email until the user hits “submit” is a bit old-school. It can feel like you’re just waiting to tell them they messed up. A much friendlier approach is live validation, where you give helpful feedback in real-time. This simple shift turns a boring form into an interactive guide.
The easiest first step is something you should already be doing: using the proper HTML5 input type. Just by setting input type="email", you’re letting the browser do some of the heavy lifting. Most modern browsers will handle basic format checking for you, often with a default error message. It’s a solid baseline that costs you nothing.
Going Further with JavaScript Events
While the browser’s built-in validation is a good start, we can make the experience feel a lot more polished with a bit of custom JavaScript. The idea is to give users immediate visual cues so they know if they’re on the right track.
I’ve found the best way to do this is by listening for two specific events:
- The
inputevent: This thing fires on every single keystroke. It’s perfect for subtle, instant feedback. Think about changing a border color from gray to red the moment the entry becomes invalid. - The
blurevent: This one triggers when the user moves their focus away from the email field. This is the perfect time to show a more descriptive error message, since they’ve likely finished typing.
Using both events together creates a balanced experience. You’re not shouting “ERROR!” with every letter they type, but you are giving them a gentle nudge as they go.
The best live validation feels like a helpful guide, not a nagging critic. You want to confirm the user’s success as it happens, building their confidence as they move through the form.
Picture this: a user types test@example. The input border might turn red. The second they add .com, it instantly flips to green. That tiny interaction is incredibly reassuring and makes the form feel less like a chore. This is how a simple javascript valid email check becomes a central part of a great user experience.
How to Implement Visual Feedback
So, how does this actually look in code? It’s pretty straightforward. The common practice is to use JavaScript to add or remove CSS classes on the fly.
First, you’d define the styles for your valid and invalid states in your CSS file.
.email-input.invalid {
  border: 2px solid #dc3545; /* A clear red for errors */
}
.email-input.valid {
  border: 2px solid #28a745; /* A nice green for success */
}
Then, your JavaScript would listen for the input and blur events we talked about and toggle these classes based on whether the email is valid. It’s a simple form of progressive enhancement that makes your forms feel smarter and less intimidating, which can make a real difference in your completion rates.
Of course, implementing this is only half the battle. You have to see how real users react to it. It’s worth looking into some essential user experience testing methods for mobile apps—many of the same principles apply directly to web forms and can give you great insight.
Handling Advanced and International Email Formats
A simple email check works great—right up until it doesn’t. We often forget that the internet is global, and email addresses have evolved far beyond the basic English alphabet. If your validation logic isn’t ready for that diversity, you risk creating a deeply frustrating experience where legitimate customers are told their email is invalid.
Just imagine an email like josé.ñuñez@café.com. A typical, basic regex pattern will likely choke on it, rejecting the address simply because it wasn’t built for characters outside the standard ASCII set. This is where internationalized email addresses become a make-or-break consideration for any application with a global audience.
Supporting International Characters
To get this right, your regex needs a serious upgrade to recognize Unicode characters. This usually means incorporating Unicode property escapes, like \p{L} (which matches any Unicode letter), into your pattern. Yes, it makes the regex look a bit more intimidating, but the alternative is turning away valid users from around the world.
And it’s not just about the characters before the @. Think about the explosion of top-level domains (TLDs). We’re no longer living in a world limited to .com or .org. We now have domains like .photography or .international. A regex that rigidly enforces a TLD length of 2-6 characters is going to incorrectly flag these perfectly valid addresses. Your validation has to be flexible. If you want to dive deeper into how modern email addresses are structured, our guide on the proper format of an email address breaks it all down.
Comparing Regex Patterns
Choosing the right regex is a trade-off between simplicity and comprehensive coverage. A simple pattern is easy to read but misses a lot of valid modern emails. A more advanced pattern is complex but far more accurate.
Here’s a quick comparison to show you what I mean:
Simple vs Advanced Regex For Email Validation
| Feature | Simple Regex | Advanced Regex |
|---|---|---|
| Basic Format | ^[^\s@]+@[^\s@]+\.[^\s@]+$ | Yes |
| Handles Subdomains | Basic support | Yes, handles multiple levels |
| TLD Length | No specific check | Yes, supports modern long TLDs |
| International Chars | No, fails on café.com | Yes, using Unicode properties |
| Readability | High | Low, can be complex to debug |
| Accuracy | Prone to false negatives | Much higher, less likely to reject valid emails |
While the advanced regex is more robust, it’s also a lot to maintain. The key is to pick the one that best fits your user base and how much you’re willing to manage.
Dealing with Disposable Email Addresses
Beyond just the format, you have to think about the intent behind the email. Disposable email addresses (DEAs) from services like Mailinator or 10MinuteMail are a big part of that. These are temporary, throwaway inboxes people use to sign up for trials or grab a freebie without handing over their real contact info.
For a lot of businesses, especially in SaaS, these sign-ups are just noise. They can be used to abuse free trial systems, clutter your marketing lists with dead-end contacts, and totally skew your engagement metrics.
Blocking disposable emails isn’t about syntax; it’s a strategic business decision. It helps ensure that your user base is made up of genuine, engaged individuals rather than anonymous accounts that will never convert.
Catching these isn’t something a regex can do. You can’t possibly maintain an updated blocklist of thousands of disposable domains on the client side. This is where you need to move the check to your server or, better yet, use a dedicated email verification service.
The principles behind a great user experience for live validation—from HTML5 to instant JavaScript feedback—are summarized well here:
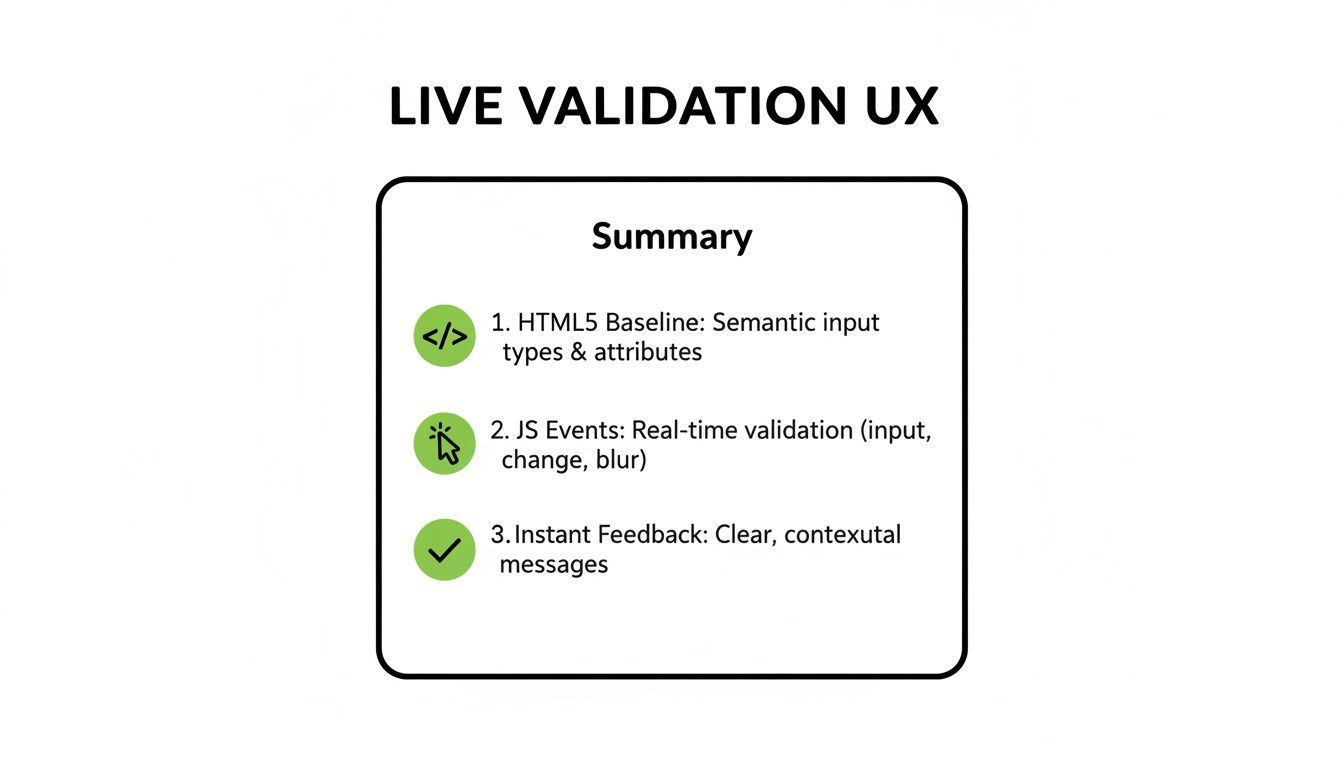
Ultimately, deciding how to handle these advanced cases is a balancing act. For a simple contact form on a personal blog, a basic regex is probably fine. But for a global e-commerce site or a SaaS product, you need a far more robust solution that embraces international formats and filters out the noise. Your choice should always reflect the real-world needs of your application.
Knowing The Limits Of Client-Side Validation
While getting client-side JavaScript validation right is a huge win for user experience, it’s just as important to understand its limits. You can have a perfectly formatted email address that’s completely fake. This is the fundamental difference between validation and verification.
JavaScript running in the browser is a champ at validation—it checks if an email looks right. Does it have an ”@” symbol? Is there a domain name? But it can’t do verification, which is the process of confirming that an actual inbox exists and can receive mail.
Validation vs. Verification
Here’s a simple way to think about it: validation is like checking that a mailing address has all the right parts—a street name, a number, a city, and a postal code. On paper, it looks legit.
Verification, on the other hand, is like sending a scout to confirm a real house actually exists at that address.
Client-side JavaScript just doesn’t have the tools for that deeper dive. It can’t perform the network lookups or talk to mail servers to see if they’ll actually accept an email for that address.
A critical mistake is assuming a syntactically valid email is a deliverable one. Client-side checks improve UX and data quality, but they offer zero protection against fake, disposable, or deactivated email addresses.
This is a massive blind spot. If you rely only on what the browser can see, you risk filling your database with addresses that are formatted correctly but are completely undeliverable.
When Server-Side Verification Is Mandatory
Some situations absolutely demand more than a simple format check. This is where you pass the email address to your backend, which then uses a specialized service to confirm it’s real.
This step is non-negotiable for:
- Email Marketing: Your sender reputation is everything. High bounce rates tell email providers you might be a spammer, which can land your domain on a blacklist.
- Transactional Emails: For crucial messages like password resets or order confirmations, you have to know they’ll reach the inbox. An undeliverable email creates a frustrating dead end for the user.
- Preventing Abuse: Savvy users will use fake or disposable emails to exploit free trials or create spam accounts. Server-side verification is your front-line defense.
Getting a handle on how these backend processes work is crucial. Learning about concepts like a backend as a service (BaaS) can demystify how these systems operate beyond the browser.
In the fast-paced world of web development, JavaScript email validation has become a cornerstone for ensuring data integrity. As of 2025, with email marketing projected to reach a staggering $17.9 billion industry value, developers rely heavily on client-side checks to prevent costly bounces that can exceed 2-5% and tank sender reputations.
The best strategy combines the strengths of both approaches. You use quick, client-side JavaScript for immediate user feedback and then follow up with robust, server-side verification to ensure the data is not just well-formed but actually usable. For a deeper look into implementing these backend checks, check out our guide on using an email verification API.
Answering Your Top Questions About JavaScript Email Validation
Once you start digging into email validation, a few questions always seem to pop up. Getting your head around the different approaches is key to building forms that don’t just work, but feel great for your users and keep your data clean.
What’s the “Best” Regex for Email Validation?
I get this question all the time, and the honest answer is… there isn’t one. It’s always a balancing act. For 90% of web forms, a straightforward regex like /^[^\\s@]+@[^\\s@]+\.[^\\s@]+$/ is more than enough. It’s easy to read, runs fast, and catches all the common typos without frustrating users with overly strict rules.
But what if you have a global user base? Then you’ll need something more robust that can handle international characters or newer top-level domains. The trick is to match the complexity of your javascript valid email code to what your users actually need. Don’t over-engineer it.
Can JavaScript Actually Tell If an Email Is Real?
This is a huge point of confusion for a lot of developers. The short answer is no. JavaScript, running in a user’s browser, absolutely cannot confirm if an email address is real or if an inbox can receive mail.
Client-side JavaScript can only perform syntax validation. It’s just checking the pattern. Does it have an ”@” symbol? Is there something that looks like a domain? That’s all it can do. It has no way to perform the network lookups (like checking for MX records) needed to see if the inbox actually exists. For that, you absolutely need a server-side process or a dedicated API.
Always work under the assumption that an email that passes client-side validation could still be fake, a temporary address, or completely inactive. Client-side validation is about user experience; true verification is about data integrity.
Client-Side vs. Server-Side: Which One Should I Use?
This isn’t an either/or situation. The real answer is both. They play two completely different, yet equally critical, roles. Using only one leaves a massive gap in your form’s functionality and security.
Client-Side Validation: Think of this as your user experience (UX) layer. It gives people instant feedback right in the form, helping them fix a typo before they even hit “submit.” It makes your app feel snappy and helpful instead of slow and clunky.
Server-Side Validation: This is your line of defense for security and data quality. It’s the ultimate source of truth because anyone with a bit of know-how can disable or bypass client-side JavaScript. Your server must always validate the data it receives.
When you use them together, you get the best of both worlds: a smooth, responsive experience for your users and a secure, reliable backend for your application.
Ready to stop wondering if your emails will bounce? Syntax checks only get you so far. Truelist delivers real-time email verification—with pay-as-you-go credits that never expire, plus unlimited plans for high-volume senders—to slash bounce rates, safeguard your sender reputation, and keep your lists pristine. Move from guessing to knowing by visiting https://truelist.io and get started for free.