
 Claude
  Perplexity
Your Guide to Email Sender Reputation Score
Unlock better email deliverability by mastering your email sender reputation score. Learn how it's calculated, how to check it, and how to improve it.
TL;DR: Unlock better email deliverability by mastering your email sender reputation score. Learn how it's calculated, how to check it, and how to improve it.
Think of your email sender reputation score as your email’s credit score. It’s a simple number, usually from 0 to 100, that tells Internet Service Providers (ISPs) like Gmail and Outlook whether you’re a trustworthy sender. A high score is your golden ticket to the inbox, while a low score gets your emails sent straight to spam—or blocked completely.
Decoding Your Email Sender Reputation Score

This score is the invisible force deciding if your audience ever sees your carefully crafted messages. It’s not just some vanity metric; it’s the bouncer at the inbox door. Every single time you hit “send,” ISPs run a quick background check on you, and this score is the main piece of evidence they look at.
It’s a single, powerful number that neatly summarizes your entire sending history. ISPs use it to guess whether your future emails will be valuable to their users or just more digital junk. A strong reputation tells them you’re a legitimate sender who sends content people actually want.
Why This Score Is So Powerful
Imagine you’re a courier. If you have a reputation for damaging packages or delivering to the wrong address, people will stop trusting you pretty fast. Your email sender reputation works exactly the same way. A history of negative signals—like spam complaints or bounces—tells ISPs that you can’t be trusted to deliver quality “packages” to their users’ inboxes.
At its core, your email reputation is a direct reflection of how much you respect your subscribers. If people genuinely like getting your emails, their behavior shows it, and you’ll be rewarded with consistent inbox placement.
This score is so critical because it directly controls your email deliverability. A low score means your emails get flagged as spam or rejected outright. In contrast, a high score gives you a green light. If you have ever wondered why your emails bounce back, a damaged sender reputation is almost always part of the answer — and bounces themselves further damage the score, creating a downward spiral.
Understanding the Tiers of Trust
Not all scores are created equal. A score of 95 has a wildly different impact than a score of 65. ISPs use these scores to sort senders into different tiers of trustworthiness, which determines how aggressively they filter your emails. Recognizing this is key to understanding why maintaining a good reputation is the foundation of successful email marketing and achieving a high Email Marketing For 4200 Roi.
To give you a better idea, here’s a quick summary of what different sender score ranges mean for your email deliverability.
Email Sender Reputation Score Tiers and Their Impact
| Score Range | Reputation Level | Expected Email Outcome |
|---|---|---|
| 90-100 | Excellent | ISPs see you as a top-tier sender. Your emails face minimal filtering and go to the inbox. |
| 70-89 | Good | You’re considered reliable. Most emails land in the inbox, with occasional spam placement. |
| 50-69 | Average | ISPs are cautious. A significant portion of your emails will likely go to the spam folder. |
| 0-49 | Poor | Your reputation is damaged. Most of your emails will be blocked or sent directly to spam. |
As you can see, your score isn’t just a number—it’s a direct forecast of your campaign’s success. Staying in the higher tiers is non-negotiable if you want to reach your audience effectively.
What Changed in 2024 (and What’s New in 2026)
In February 2024, Google and Yahoo rolled out new bulk sender requirements that fundamentally changed the floor for inbox placement. Anyone sending more than 5,000 emails per day to Gmail or Yahoo addresses now has to meet a strict baseline:
- Authenticate with SPF, DKIM, and DMARC. All three. Partial setups no longer cut it.
- Keep spam complaint rates below 0.3%, with a strong recommendation to stay under 0.1%. Crossing 0.3% triggers throttling almost immediately.
- Include a one-click unsubscribe header (RFC 8058) on marketing mail, with the unsubscribe action honored within two days.
- Use a domain that aligns with your From address for DKIM signing (DMARC alignment).
By 2026, these rules have stopped being a “new requirement” and become the baseline that inbox providers assume you already meet. The bar has moved higher in two ways:
- Microsoft followed suit. Outlook.com and Hotmail now enforce nearly identical rules for high-volume senders, closing the loophole where Microsoft was previously more lenient than Google.
- Engagement weighting got heavier. ISPs now rely even more on first-party engagement signals (replies, forwards, time spent reading) and less on raw volume or open rates, which have been distorted by mail privacy protection on Apple Mail.
If you have not already audited your SMTP authentication setup, do it before anything else in this guide. Without SPF, DKIM, and DMARC in place, the rest of your reputation work is building on sand.
How Your Sender Score Is Calculated
Ever wonder how inbox providers like Gmail and Outlook decide whether your email lands in the inbox or the spam folder? It’s not magic. It comes down to your sender score, a number that functions a lot like a credit score for your email program.
This score isn’t static. It’s a living metric that goes up or down based on the signals you send with every single campaign. ISPs are always watching, and every email you send gives them new data points to evaluate whether you’re a trustworthy sender or a potential spammer.
The Impact of Bounce Rates
One of the first things ISPs scrutinize is your bounce rate. This is simply the percentage of your emails that couldn’t be delivered. But not all bounces are created equal.
A soft bounce is a temporary issue, like a recipient’s inbox being full. It’s not great, but it’s understandable. A hard bounce, however, is a permanent failure because the email address is invalid or doesn’t exist. This is a massive red flag for ISPs.
Why? Because a high hard bounce rate suggests you’re not managing your list properly. It looks like you might have bought a list or are using old, unverified data—classic spammer behavior. Nothing will tank your sender score faster than repeatedly trying to email dead addresses.
This image breaks down the core factors that build—or break—your reputation.
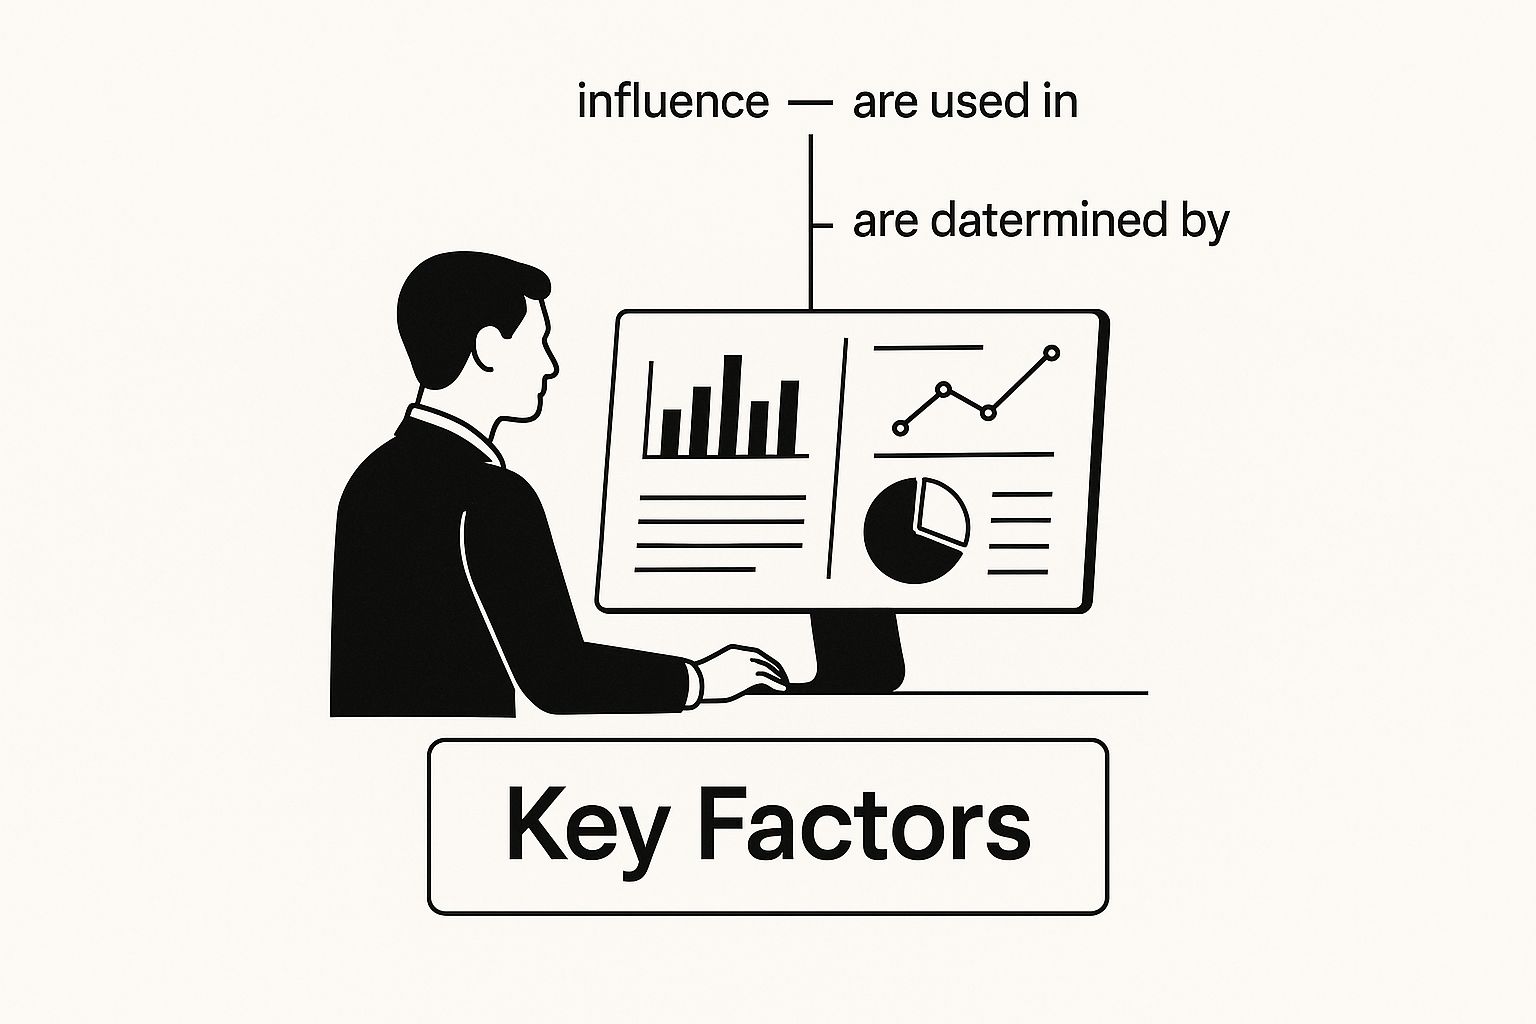
As you can see, it’s a blend of technical fundamentals, the quality of your list, and how your audience actually interacts with what you send.
The Role of Audience Engagement
How your subscribers engage with your emails speaks volumes. ISPs see positive interactions as direct proof that your content is wanted and valuable.
Good engagement looks like this:
- High Open Rates: People recognize your name and are eager to see what you have to say.
- Solid Click-Through Rates (CTR): Your content is relevant enough that subscribers are clicking your links.
- Replies and Forwards: These are gold. An email that starts a conversation or gets shared is clearly not spam.
On the flip side, negative signals can be devastating, and none is more damaging than a spam complaint.
When someone hits the “Mark as Spam” button, they’re sending the loudest possible negative signal to their ISP. They’re basically shouting, “This is junk, and I never want to see it again.”
Even a handful of spam complaints can do serious harm. The numbers that matter:
- Spam complaint rate: under 0.1% is the goal, 0.3% is the hard ceiling. Gmail will start throttling you the moment you cross 0.3%. Outlook is even less forgiving.
- Hard bounce rate: keep it under 2%. Anything over 5% is a five-alarm fire — your list quality is broken and you need to pause sending until you clean it. Use a bounce checker before any large send.
- Soft bounce rate: under 5% is healthy. Persistent soft bounces should be treated as hard bounces after three to five consecutive failures.
- Open rate: stay above 15% for marketing mail, ideally 20%+. Engagement is what tells ISPs your mail is wanted.
- Spam trap hits: zero. Even one pristine spam trap hit can pull your reputation down for weeks.
If you’re hovering near any of these limits, treat it as an emergency. Pause your sends, segment by engagement, and run your list through a free email validation tool before resuming.
Consistency and Technical Authentication
ISPs love predictability. A sender with a steady, consistent email volume is far more trustworthy than one whose activity is all over the place. Imagine a new domain suddenly blasting out 500,000 emails—it looks incredibly suspicious and is an easy way to get flagged.
This is exactly why “warming up” a new IP or domain is so critical. You start small and gradually increase your sending volume. This methodical approach builds a positive sending history and proves to ISPs that you’re a legitimate player, not a spammer trying a smash-and-grab.
Finally, your technical setup is your digital passport. It proves you are who you say you are. Three authentication protocols are absolutely essential:
- SPF (Sender Policy Framework): This is a public list of the mail servers authorized to send email from your domain.
- DKIM (DomainKeys Identified Mail): This adds a tamper-proof digital signature to your emails, confirming the message wasn’t faked or altered.
- DMARC (Domain-based Message Authentication, Reporting & Conformance): This ties SPF and DKIM together and tells ISPs how to handle emails that fail the checks.
Getting these three protocols configured correctly isn’t just a suggestion anymore; it’s a requirement from major providers like Gmail and Yahoo. Without proper authentication, even the most brilliant email content is likely to end up in the spam folder.
How to Check Your Sender Reputation Score

You can’t fix what you can’t see. When it comes to email deliverability, guessing is a surefire way to land in the spam folder. To make any real progress, you need hard data. Luckily, there are some great tools out there that can help you diagnose your email sender reputation score and turn those abstract worries into concrete numbers you can actually work with.
Think of it like checking the dashboard in your car. You wouldn’t set off on a long road trip without a quick glance at the fuel gauge, right? In the same way, you shouldn’t launch a major email campaign without knowing where your reputation stands. These tools give you that critical visibility.
Starting With Industry Standard Tools
A great place to start is with one of the most recognized third-party tools, Validity’s Sender Score. It works a lot like a credit score for your email, giving you a simple number that sums up your sending habits. This score is your first clue as to how mailbox providers like Gmail and Outlook see your IP address.
Sender Score grades you on a scale from 0 to 100, based on a rolling 30-day average of your IP’s performance compared to others worldwide. Generally speaking, a score above 80 is a strong signal that you’re doing things right.
As you can see in the screenshot, checking your score is straightforward. This simple step is your entry point into managing your reputation with data, not just hoping for the best.
Tapping Into ISP-Specific Resources
While third-party tools give you a solid overview, the most valuable insights come directly from the source. The major inbox providers—the ones who actually decide where your emails go—offer their own free portals. This isn’t an estimate; it’s a direct report from the gatekeepers themselves.
If you’re serious about deliverability, you need to be using all four of these:
- Google Postmaster Tools: An absolute must for anyone sending to Gmail addresses. It digs into your domain and IP reputation, spam complaint rates, and delivery errors, all from Google’s perspective.
- Microsoft Smart Network Data Services (SNDS): This is the equivalent for Outlook, Hotmail, and other Microsoft inboxes. SNDS gives you a look into the traffic coming from your IPs, including critical data on complaint rates and how many spam traps you’re hitting.
- Cisco Talos Intelligence: A free reputation lookup for both your IP and your domain. Talos powers the spam filtering for a huge slice of corporate inboxes, so a “Poor” rating here means your B2B mail is in trouble even when Gmail still likes you.
- Spamhaus and other blocklist checks: A single blocklist listing can crater your deliverability overnight. Tools like MXToolbox’s blocklist checker or Spamhaus’s own lookup pull data from dozens of public RBLs at once.
Using these is like getting your report card straight from the teacher. They tell you exactly where you stand and what you need to work on to improve your grade—or in this case, your inbox placement.
Setting Up Google Postmaster Tools (Step by Step)
Postmaster Tools is free, and there’s no reason any serious sender should not have it configured. Here’s the actual workflow:
- Go to
postmaster.google.comand sign in with the Google account you want to use as the owner. - Click Add domain and enter the domain you send from (the domain after the
@in your From address — not your website domain if they differ). - Google gives you a TXT record to add to that domain’s DNS. Add it through your DNS provider (Cloudflare, Route 53, GoDaddy, whoever).
- Wait for DNS propagation (usually under an hour, sometimes up to 48 hours) and click Verify.
- Data starts flowing in about 24-48 hours once you have enough volume to Gmail (Google needs hundreds of messages per day before any dashboard populates).
Once it’s live, the dashboards to check weekly:
- Domain Reputation and IP Reputation — Google’s direct verdict on you.
- Spam Rate — your spam complaint percentage among Gmail users only. Stay below 0.1%; 0.3% triggers enforcement.
- Authentication — passing percentages for SPF, DKIM, and DMARC. Anything below 99% here points to a misconfiguration worth fixing.
- Delivery Errors — bounces broken down by Google’s actual error codes, which often reveal exactly what’s blocking you.
Setting Up Microsoft SNDS
SNDS is older and clunkier than Postmaster Tools, but it’s still the best window into Outlook deliverability:
- Go to the SNDS portal (
sendersupport.olc.protection.outlook.com/snds) and sign in with a Microsoft account. - Click Request Access and submit each sending IP (or IP range, in CIDR notation).
- Microsoft sends a verification email to the abuse@ and postmaster@ contacts for the IP’s reverse DNS — confirm those mailboxes exist on your end before submitting, or use the alternate verification path with your hosting provider.
- Approval is manual and can take a few days. Once approved, you get daily traffic reports per IP.
The metrics that matter in SNDS:
- Filter Result (Green, Yellow, Red) — the headline reputation rating.
- Complaint Rate — Outlook’s view of your spam button presses.
- Trap Message Period — flags if you hit any of Microsoft’s spam traps. Even one is a serious warning sign.
- RCPT Commands — total recipient attempts, useful for sanity-checking that the IP volume matches what you think you’re sending.
For both tools, the right cadence is a Monday morning check during normal operations and a daily check during any reputation incident.
What to Look For in Your Reports
When you log into these platforms, you’ll see a lot of different metrics. It’s easy to get lost in the data, so it helps to focus on the numbers that have the biggest impact on your email sender reputation score.
Your goal isn’t just to see a number; it’s to understand the story that number is telling. If you see a dip in your IP reputation in Google Postmaster Tools right after a campaign, that’s a huge clue that something in that email missed the mark with your audience.
Here are the critical metrics to keep an eye on:
- IP and Domain Reputation: Both Google and Microsoft will give you a direct rating, usually something like Good, Medium, Low, or Bad. This is their unfiltered opinion of you.
- Spam Complaint Rate: This is the percentage of people who hit the “spam” button on your email. You absolutely must keep this number below 0.1%.
- Authentication Results: These tools will show you if your emails are passing SPF, DKIM, and DMARC checks. These are the technical handshakes that prove you are who you say you are.
- Spam Trap Hits: Microsoft’s SNDS is especially good at showing you if you’re sending to spam traps—inactive email addresses used to catch senders with messy, outdated lists.
By checking these tools regularly, you can stop guessing and start making smart, informed decisions. This proactive approach lets you catch problems early, fix them before they do real damage, and build a sender reputation that’s rock-solid.
Actionable Strategies to Improve Your Sender Score
Knowing your sender score is one thing, but actually improving it? That’s where the real work begins. Boosting your reputation isn’t about some secret hack or quick fix. It’s about consistently showing Internet Service Providers (ISPs) that you’re a trustworthy sender and that people genuinely want to receive your emails.
Think of it like building any good relationship. It takes time, good habits, and a real commitment to respecting your audience. These strategies are your playbook for turning a so-so reputation into a stellar one, making sure your messages land where they belong: the inbox.
Practice Meticulous List Hygiene
If you do only one thing, make it this: keep your email list squeaky clean. Nothing tanks a sender score faster than sending emails to invalid, inactive, or fake addresses. This kind of activity screams “careless sender” to ISPs, and high bounce rates will drag your reputation through the mud.
Regular list cleaning isn’t optional; it’s essential. You have to be ruthless about removing contacts who just aren’t engaging anymore.
- Remove Hard Bounces Immediately: A hard bounce means the email address is permanently dead. There’s zero reason to keep it. Get rid of it the second it’s flagged.
- Create a Sunset Policy: Got subscribers who haven’t opened or clicked an email in, say, 90 or 120 days? Send them one last re-engagement campaign. If they don’t bite, it’s time to say goodbye. A smaller, engaged list is always more valuable than a huge, dormant one.
- Validate New Subscribers: Use a real-time email validation service at the point of sign-up. This simple step stops typos and bogus emails from ever polluting your list.
Proactively managing your list sends a clear message to ISPs: you respect their networks and their users. That’s the foundation of a great email sender reputation score.
Build a Foundation with Double Opt-In
How you get subscribers in the first place sets the stage for your entire relationship. A single opt-in is faster, sure, but it opens the door to bots, typos, and people who aren’t really interested. The double opt-in process, on the other hand, is the gold standard for building a quality, engaged audience right from the start.
Here’s the simple breakdown:
- A person signs up using a form on your site.
- They instantly get an email asking them to confirm their subscription by clicking a link.
- Only after they click that link are they officially added to your list.
This two-step dance confirms two things: the email address is valid, and the person behind it really wants to hear from you. The result? Sky-high engagement and rock-bottom spam complaints—two of the most critical factors in your sender score. For a deeper dive into this crucial first step, check out our guide on how to verify emails.
Correctly Warm Up New Domains and IPs
If you’re starting fresh with a new sending domain or a dedicated IP, you can’t just flip a switch and send thousands of emails. A brand-new IP has no history, which looks incredibly suspicious to ISPs. You have to “warm it up” by slowly and carefully building a positive sending track record.
A proper warm-up process is like making a good first impression. You start with a friendly handshake—a small batch of emails to your most engaged fans—and build rapport over time. Rushing it is like shouting at someone you just met.
The process is methodical. You start with a tiny volume, maybe just 50–100 emails a day, and send them only to your most active subscribers. As ISPs see positive signals like opens and clicks (and no negative ones), you can gradually increase your daily or weekly volume. This slow-and-steady approach proves you’re a legitimate sender building trust from the ground up.
Prioritize Subscriber Engagement Above All
At the end of the day, your sender score is a direct reflection of how much your audience values your emails. ISPs are watching every interaction, and positive engagement is the most powerful signal you can send. A Sender Score over 80 is widely considered excellent, and it’s the key to getting great inbox placement and campaign ROI.
To get there, you have to deliver content people actually want. This is especially true for automated email marketing campaigns. Stop sending one-size-fits-all blasts and start segmenting your audience. When you deliver relevant, timely, and valuable messages, subscribers will reward you with the opens, clicks, and replies that build and protect a fantastic sender reputation.
Sender Score Problem and Solution Checklist
Struggling to connect specific issues with the right fixes? This table provides a quick reference to help you diagnose common problems and apply the correct solution to get your sender score back on track.
| Common Problem | Impact on Sender Score | Actionable Solution |
|---|---|---|
| High Hard Bounce Rate | Severely damages reputation; signals poor list quality. | Implement real-time email validation and remove hard bounces instantly. |
| Low Open & Click Rates | Indicates subscriber disinterest and content irrelevance. | Segment your list, personalize content, and A/B test subject lines. |
| High Spam Complaint Rate | The most damaging signal; directly tells ISPs you’re unwanted. | Use double opt-in, make unsubscribing easy, and send valuable content. |
| Sending from a New IP | Looks suspicious to ISPs due to no sending history. | Follow a strict, gradual IP warm-up schedule. |
| Hitting a Spam Trap | Major red flag; indicates scraped or outdated lists. | Regularly clean your list and use a sunset policy for inactive users. |
Think of this checklist as your first-aid kit for email deliverability. By consistently addressing these issues, you’re not just fixing problems—you’re actively building a healthier, more resilient sender reputation for the long haul.
How to Repair a Damaged Sender Reputation
When your reputation has already taken a hit, the fix is not “send better emails next time.” You need a structured recovery. Here is the order of operations that actually works, based on the dozens of recovery cases deliverability consultants run every quarter.
Step 1: Stop the Bleeding
The first move is always to pause non-essential sends. Promotional blasts, re-engagement campaigns, anything bulk — all of it stops until you understand what broke. Continuing to send while your reputation is poor just digs the hole deeper. Keep transactional mail (password resets, receipts) flowing because they’re typically high-engagement and help, not hurt, your reputation.
Step 2: Diagnose the Root Cause
Pull data from all four monitoring tools (Postmaster, SNDS, Talos, blocklist checks) on the same day. You’re looking for the specific failure mode:
- Sudden spam complaint spike? A recent campaign hit the wrong audience or had a bad subject line.
- Sudden bounce spike? Your list quality is broken — likely an old segment you accidentally reactivated, or you added a bad import.
- Blocklist listing? Find which blocklist (Spamhaus SBL, Barracuda, SpamCop, etc.) and follow that specific list’s delisting process.
- Authentication failures? A DNS change broke SPF/DKIM. Check your reverse DNS and DMARC reports too.
- Gradual decline with no obvious incident? Engagement has been quietly eroding for months. You need a sunset policy.
Step 3: Clean the List Aggressively
This is non-negotiable. Run your entire active list through validation and remove every invalid, risky, or role-based address. Then segment by engagement: anyone who hasn’t opened or clicked in 90 days gets parked. Consultants regularly see 20-40% of “active” lists turn out to be dead weight that’s been silently tanking deliverability. Tools like email list cleaning services handle this at scale.
Step 4: Segment by Engagement and Restart Slowly
Once your list is clean, build an “engaged” segment: people who have opened or clicked in the last 30 days. This is your warm-up audience. Send only to them for the first one to two weeks of recovery. As Postmaster Tools shows your reputation climbing, gradually expand to 60-day engagers, then 90-day. This rebuilds positive signal before you risk touching the long tail.
Step 5: Isolate Streams If You Can
If you send both transactional and marketing mail from the same IP and domain, the marketing mail’s problems are dragging your transactional deliverability down too. The fix is stream isolation:
- Separate subdomains for marketing (
mail.yourdomain.com) and transactional (txn.yourdomain.com). Both inherit your root domain’s reputation but have their own independent track records. - Separate IPs or IP pools if you’re on a dedicated infrastructure. Even a shared ESP usually offers segmented pools.
This way, a future incident on one stream doesn’t take everything down with it.
Step 6: Request Delisting Where Required
If you ended up on a blocklist, most major ones have a self-service removal form. Spamhaus, Barracuda, and SpamCop all let you request review once you’ve actually fixed the underlying issue. Don’t request delisting before fixing the root cause — getting relisted hours later makes the next removal far harder.
Realistic timelines: a moderate reputation hit recovers in two to four weeks with disciplined sending. A severe hit (blocklist listing, sustained spam rate over 0.3%) takes six to twelve weeks. The single biggest variable is whether you actually pause and clean rather than trying to send your way out of the hole.
Why Email Validation Is Your Secret Weapon
High bounce rates are the silent killers of a great email sender reputation score. Every single time an email you send bounces back from a dead address, it sends a negative signal to Internet Service Providers (ISPs). They start to think your list hygiene is sloppy, and after too many of these signals, your reputation takes a nosedive, taking your deliverability down with it.
Imagine a postal worker who keeps trying to stuff mail into the boxes of abandoned houses. The post office would quickly start to doubt their competence. ISPs see high bounce rates the exact same way—it looks like you’re using old, purchased, or scraped lists, which is exactly what spammers do.
Protecting your sender score isn’t just about the content you send. It’s about who you send it to. And that’s where a good defense becomes your best offense.
The Gatekeeper for Your Reputation
This is where email validation comes in. Think of it as the essential gatekeeper standing guard between your hard-earned sender reputation and the damage a dirty list can do. It’s a process that systematically vets every single email address on your list for validity before you even think about hitting “send.” This one automated step acts as a powerful filter, catching problems before they ever have a chance to hurt you.
A solid validation service will check for several mission-critical issues:
- Syntax Errors: It flags obvious typos like “gnail.com” instead of “gmail.com.”
- Non-Existent Domains: It confirms the domain itself is real and actually configured to receive mail.
- Inactive Mailboxes: It verifies that the specific user mailbox exists and is active.
- Disposable Addresses: It sniffs out those temporary, throwaway email addresses that provide zero long-term value.
By scrubbing your list of these problematic addresses from the start, you dramatically slash your bounce rate. This proactive cleanup is one of the single most effective things you can do to protect your reputation.
An Investment, Not an Expense
It’s easy to look at email validation as just another business cost, but that’s a huge mistake. It’s a strategic investment that directly protects the health of your entire email marketing channel. A clean, validated list guarantees your messages are heading toward real people, which is the absolute first step toward any kind of meaningful engagement.
Sending to a 100% validated list is the ultimate sign of respect for your subscribers and for the ISPs that deliver your messages. It demonstrates a commitment to quality that is directly rewarded with a higher email sender reputation score and better inbox placement.
This simple process completely changes the game for your outreach. You stop wasting time and money sending messages into a digital black hole. Instead, all your effort goes toward connecting with genuine prospects and customers. This not only safeguards your sender score but also gives your campaign’s return on investment a serious boost. For developers, you can drop validation in directly at signup using a JavaScript email validator, a Python validation script, a PHP verification endpoint, or a REST validation API. For one-off list cleanup, a bulk verifier handles the same job without writing any code.
At the end of the day, a strong sender reputation is built on a foundation of trust. That trust begins with a clean list. When you make validation a non-negotiable step in your workflow, you’re not just avoiding problems—you’re building a more resilient, effective, and profitable email program.
Common Questions About Sender Reputation
Even when you’ve got the basics down, a few tricky questions always seem to surface when you’re in the trenches managing your email sender reputation score. Getting these details right can be the difference between making steady progress and hitting a brick wall. Let’s dig into some of the most common questions to help clear things up.
Probably the first thing everyone wants to know after a problem is, “How long will this take to fix?”
How Long Does It Take to Improve a Bad Sender Score?
Fixing a poor sender score is a marathon, not a sprint. There’s no magic wand you can wave to instantly regain the trust of Internet Service Providers (ISPs). It’s all about proving, over time, that you’ve changed your ways and can be trusted again.
Think of it like rebuilding a bad credit score. One on-time payment is a good start, but it won’t erase a history of late ones. In the same way, a single great email campaign won’t immediately undo the damage from high bounce rates and spam complaints. You have to consistently show you’re a responsible sender.
For most senders, bouncing back from a significant reputation hit takes anywhere from two to four weeks of very careful, consistent sending. In more severe cases, it can take several months. The secret ingredient is consistency—sending valuable emails to people who want them, day in and day out.
This steady, methodical approach gives ISPs enough positive signals to start seeing you in a new light. Patience is your best friend here.
Does Reputation Differ Between Gmail and Outlook?
People often wonder if their sender score is the same everywhere. The short answer is no. While a general score from a service like Sender Score is a great starting point, the big mailbox providers like Gmail and Outlook have their own internal, secret-sauce scoring systems.
This means your emails might land perfectly in Gmail inboxes but struggle to get through to Outlook users, or the other way around.
Each ISP has its own priorities and tunes its algorithm based on what it thinks is important. For example:
- Gmail pays very close attention to how users interact with your emails—opens, clicks, and especially replies are huge signals for them.
- Outlook (Microsoft) is known to be particularly tough on spam complaints and is very good at setting up spam traps to catch senders with bad lists.
This is exactly why you need to use the tools these providers give you, like Google Postmaster Tools and Microsoft SNDS. They offer a peek behind the curtain, showing you how they see your mail so you can focus your efforts where they’ll make the biggest difference.
How Switching Platforms Affects Your Reputation
Finally, a common fear for marketers is what happens to their reputation when they move to a new email service provider (ESP). Does all that hard work just vanish? The answer lies in two separate parts of your reputation: your IP reputation and your domain reputation.
Your IP reputation is tied to the specific server that sends your emails. When you move to a new ESP, you typically get a new IP address, so that part of your reputation doesn’t come with you. This is precisely why a proper IP warm-up process is absolutely essential when you switch.
But the good news is that your domain reputation—which is connected to your sending domain, like yourbrand.com—does follow you. ISPs have built up a history with your domain over years, and this is a much more stable and powerful factor in the long run. A great domain reputation acts as a solid foundation, making the move to a new platform a whole lot smoother.
What’s the Difference Between Sender Score and Sender Reputation?
People use these terms interchangeably, but there’s a useful distinction. Sender reputation is the umbrella concept — the overall trust each ISP has in your IP and domain. Sender Score specifically refers to Validity’s branded 0-100 metric, which is a single third-party estimate of your IP reputation. Your Validity Sender Score is one data point inside your broader sender reputation picture. Treat it as a smoke alarm, not a full diagnosis.
How Often Should I Be Checking My Reputation?
For a healthy, established program, a weekly check of Postmaster Tools and SNDS is enough. Look at Spamhaus, Talos, and a domain spam rating tool monthly. During an incident — or in the two weeks after any major sending change (new ESP, new IP, big template overhaul, list import) — bump it to daily until things stabilize.
Does Email Content Affect My Sender Reputation?
Yes, but not the way most people think. ISPs are not running keyword filters for words like “free” anymore — that’s a 2010 worry. What modern filters care about is the engagement your content produces. Subject lines that mismatch the email body, deceptive sender names, broken links, image-only emails with no text fallback, and missing unsubscribe links all hurt because they suppress engagement and provoke complaints. Good subject line practices matter because they drive opens, and opens drive reputation.
Can I Recover from Being on Spamhaus?
Yes, but only after you’ve genuinely fixed what got you listed. Spamhaus runs the largest IP and domain blocklists on the internet, and once listed you’re effectively invisible to most corporate inboxes until you’re delisted. The recovery path: identify which list you’re on (SBL, CSS, DBL, PBL — each has a different delisting process), fix the root cause (compromised account, bad list, missing authentication, whatever it was), then submit a delisting request through lookup.spamhaus.org. First-time listings are usually removed within 24-72 hours if the underlying problem is genuinely resolved.
Should I Use a Shared or Dedicated IP?
Below roughly 100,000 messages per month, a shared IP at a reputable ESP is usually better. Your volume is too low to build a stable reputation on a dedicated IP, and the shared pool’s existing good reputation gives you a tailwind. Above 200,000 per month, a dedicated IP (with a proper warm-up) gives you full control of your reputation and isolates you from the bad behavior of pool-mates. Between those numbers, it’s a judgment call based on how much control you want.
Ready to build and protect a stellar sender reputation? Truelist provides truly unlimited email validation to ensure you only send to real, engaged recipients. Slash your bounce rates, avoid spam traps, and watch your deliverability soar. Validate your first list for free at Truelist.